Showing posts with label diy. Show all posts

DIY -headband with glittery stars-


DIY - headband with glittery stars-
You will need:
- a crochethook
- silver yarn and thicker purple yarn
-purple stars from foam
-needle
-embroidery thread

If you don't know how to crochet, just look
over at you tube and you will find lot's of
instruction videos how to do so.

Use two pieces of yarn and make 60 singles.
Now add the foam purple stars by using your
embroidery thread and secure them with
a single stitch. Make sure they are tight,
but not to tight!

ta da you're glittery stars headband is ready!

It was not easy to make a good picture,
but i think this one will do ;)

XO. Vera

ps If you like to see more inspiration + DIY's, take a look over at my own blog Seni with love

Christmas decorations DIY: owl


Supplies:
2,5 mm hook
matching cotton yarn

Terms used:
ch = chain
sc = single crochet
dc = double crochet
dec = decrease, single crochet two stitches together
st = stitch

This pattern is worked in spirals. The rows are not closed. The new row starts in the first stitch of the previous row.

Pattern:
body:
ch2 (or use a magic loop)
1) 6sc in 2nd st from hook (or 6sc in magic loop)
2) 2sc in each st around (12 sc)
3) (2sc in first st, sc in next st), repeat around (18 sc)
4) (2sc in first st, sc in next 2 st), repeat around (24 sc)
5) (2sc in first st, sc in next 3 st), repeat around (30 sc)
6) (2sc in first st, sc in next 4 st), repeat around (36 sc)
7-22) sc in each st around (36 sc)
23) (dec, sc in next 4 st) in back loops, repeat around (30 sc)
24) (dec, sc in next 3 st), repeat around (24 sc)
25) (dec, sc in next 2 st), repeat around (18 sc)
26) (dec, sc in next st), repeat around (12 sc)
STUFF
27) (dec), repeat around (6 sc)
FINISH OFF

eyes (make 2):
ch2 (or use a magic loop)
1) 6sc in 2nd st from hook (or 6sc in magic loop)
2) 2sc in each st around (12 sc)
3) (2sc in first st, sc in next st), repeat around (18 sc)
FINISH OFF

ears (make 2):
ch2
2sc in 2nd st from hook
FINISH OFF

wings (make 2):
ch7
1) sc in 2nd st from hook, sc in next 4 st, 8dc in last st of chain
Keep on working in the established direction, the next stitches are worked in beginning chain
sc in next 4 st, 3sc in last st before the first st of this round
2) sc in next 5 st, 2sc in next 8 st, sc in next 4 st, (2sc) in next 3 st
3) sc in next 5 st, (2sc, sc in next st) 8 times, sc in next 4 st, (2sc, sc in next st) 3 times
4) sc in next 5 st
FINISH OFF

Make the pupils, beak and feet out of felt

Sew the wings, ears and eyes to the body.
Use glue to paste the pupils, beak and feet to the body.


Liever Nederlands? Het originele, Nederlandse patroon staat op mijn eigen blog.

Christmas decorations DIY: christmas tree


Supplies:
2,5 mm hook
matching cotton yarn

Terms used:
ch = chain
sc = single crochet
dec = decrease, single crochet two stitches together
st = stitch

This pattern is worked in spirals. The rows are not closed. The new row starts in the first stitch of the previous row.

Pattern:
Tree:
ch2 (or use a magic loop)
1) 6sc in 2nd st from hook (or 6sc in magic loop)
2-3) sc in each st around (6 sc)
4) 2sc in each st around (12 sc)
5-6) sc in each st around (12 sc)
7) (2sc in first st, sc in next st), repeat around (18 sc)
8-9) sc in each st around) (18 sc)
10) (2sc in first st, sc in next 2 st), repeat around (24 sc)
11-12) sc in each st around (24 sc)
13) (2sc in first st, sc in next 3 st), repeat around (30 sc)
14-15) sc in each st around (30 sc)
16) (2sc in first st, sc in next 4 st), repeat around (36 sc)
17-18) sc in each st around (36 sc)
19) (dec, sc in next 4 st) in back loops, repeat around (30 sc)
20) (dec, sc in next 3 st), repeat around (24 sc)
21) (dec, sc in next 2 st), repeat around (18 sc)
22) (dec, sc in next st), repeat around (12 sc)
STUFF
23) (dec), repeat around (6 sc)
FINISH OFF

Stem:
ch2 (or use a magic loop)
1) 6sc in 2nd st from hook (or 6sc in magic loop)
2) 2sc in each st around (12 sc)
3-5) sc in each st around (12 sc)
FINISH OFF

Put a little bit of stuffing in the stem and sew it to the bottom of the tree.

Use colored thread to embroider the decorations on the tree.


Liever Nederlands? Het originele, Nederlandse patroon staat op mijn eigen blog.

Christmas decorations DIY: christmas ball


Supplies:
2,5 mm hook
matching cotton yarn

Terms used:
ch = chain
sc = single crochet
dec = decrease, single crochet two stitches together
3dec = decrease three stitches, single crochet three stitches together
st = stitch

This pattern is worked in spirals. The rows are not closed. The new row starts in the first stitch of the previous row.

Pattern:
ch2 (or use a magic loop)
1) 6sc in 2nd st from hook (or 6sc in magic loop)
2) 2sc in each st around (12 sc)
3) (2sc in first st, sc in next st), repeat around (18 sc)
4) (2sc in first st, sc in next 2 st), repeat around (24 sc)
5) (2sc in first st, sc in next 3 st), repeat around (30 sc)
6) (2sc in first st, sc in next 4 st), repeat around (36 sc)
7-12) sc in each st around (36 sc)
13) (dec, sc in next 4 st), repeat around (30 sc)
14) (dec, sc in next 3 st), repeat around (24 sc)
15) (dec, sc in next 2 st), repeat around (18 sc)
16) (dec, sc in next st), repeat around (12 sc)
STUFF
17) (dec), repeat around (6 sc)
18) 3dec, 3dec, ch15
Cut off yarn, leaving a little tail. Use the tail to sew the top of the chain to the top of the ball, making a loop to hang the ball from.
FINISH OFF

Liever Nederlands? Het originele, Nederlandse patroon staat op mijn eigen blog.

DIY -Make your own Xmas soap garland-

It's DIY time!! I made this a few days ago over at my own blog and also will share it here. For today we are gonna make a Xmas soap garland. It's not a whole new concept, but i have made one with mixed materials. You can hang it in your bathroom or toilet, just for a little Xmas feelin' (and it smells great!) or make one as a Xmas gift :)

DIY -Xmas soap garland-
supplies:
- little white pompoms
-wooden beads
-little soap stars
- kitchen/garden yarn
-needle
-little piece of ribbon

1 I first started with knotting this cute heart

2. Then it is already time for the fun part!!
Thread all your things on the yarn the way
you like it. Your needle will get soap on it,
so it's necessary to clean it from time to time.
If it's difficult to pull the needle through use
your tshirt or a tea towel for it.

3. You can make it as long as you like!
When your done just make a knot at the end.

4. Finish it with a loop, this way you can
hang your soap garland easily.

5. Then it will look like this!
Cut the end and finish your garland
with a cute bow.

And you are done!

XO. Vera

DIY -make your own little goodie/giftbag-

Well hello, i hope you are still enjoying our (crafty) blog :) For today i have another DIY for you. I made this post several months ago over at my own blog, but with the upcoming Holidays i thought it would be lovely to also share it here ❤

When i was sorting out my craftsupplies i saw all my pretty wrappingpapers and thought it was a pity that they were just lying around, instead of being used! There's such pretty (gift)paper all around! Just a few examples: Christmas wrapping paper, scrapbookpaper or even design your own!


Supplies
- (gift)paper
-scissors
-double sided tape

cut a piece of paper in the size that you like

fold your paper

fold the other (smaller half) over the big one

confirm you double sided tape
and fold the smaller side over it

fold the 'bottem' up

add double sided tape
fold & make sure it's solid

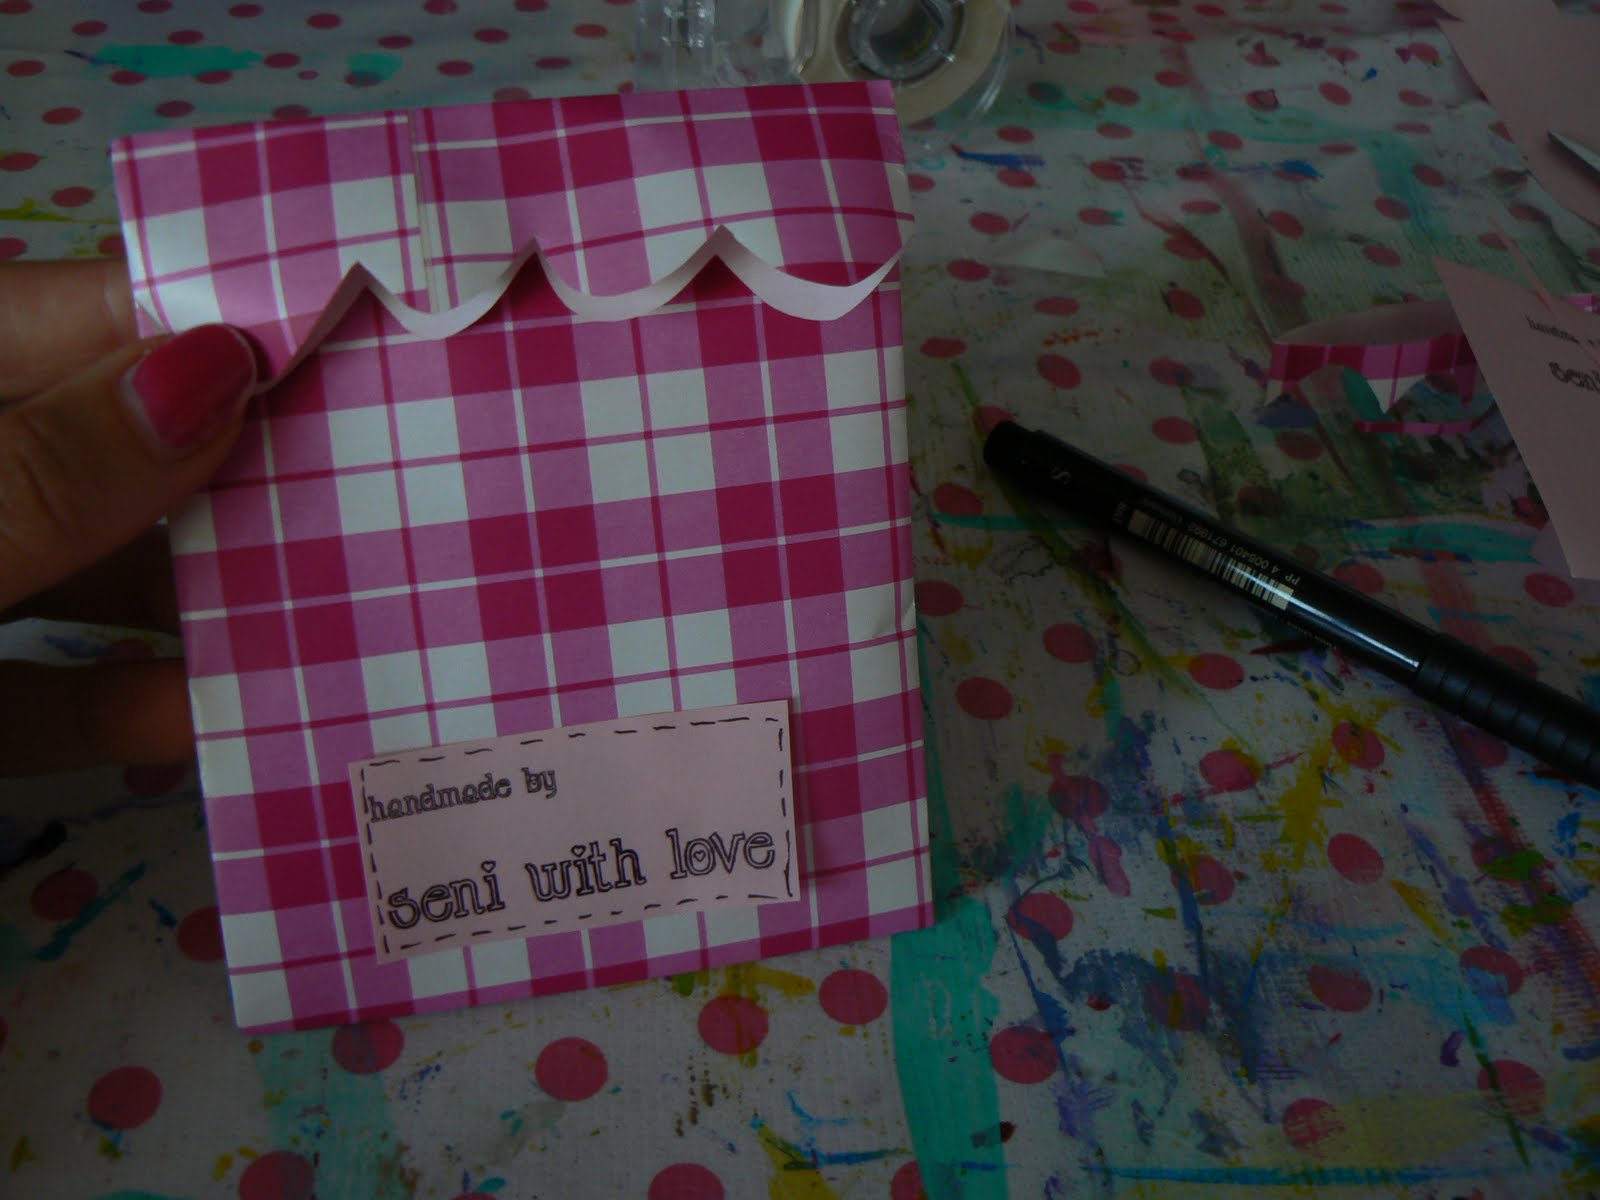
almost done..

i've cut a little 'wave' on top with the siccors
& added my own 'business' card

You can use little clothespins to close it,
use a stapler and add your 'business' card there.
You can also make two holes on top and pull
a little ribbon through etc.

There are endless ways..
explore yours xD

XO. Vera

DIY -mini fall scrapbook-

Fall is one of my favorite seasons and i've been wanting to make a mini scrapbook for a while now and i finally did and i thought it would be great to share it with you :)

DIY -mini fall scrapbook-
Everyone has his own favorite scrapbook supplies,
here are some of mine:
-crop-a-dile
-japanese tape
-feathers
-polaroids
-felt
-cute ribbons

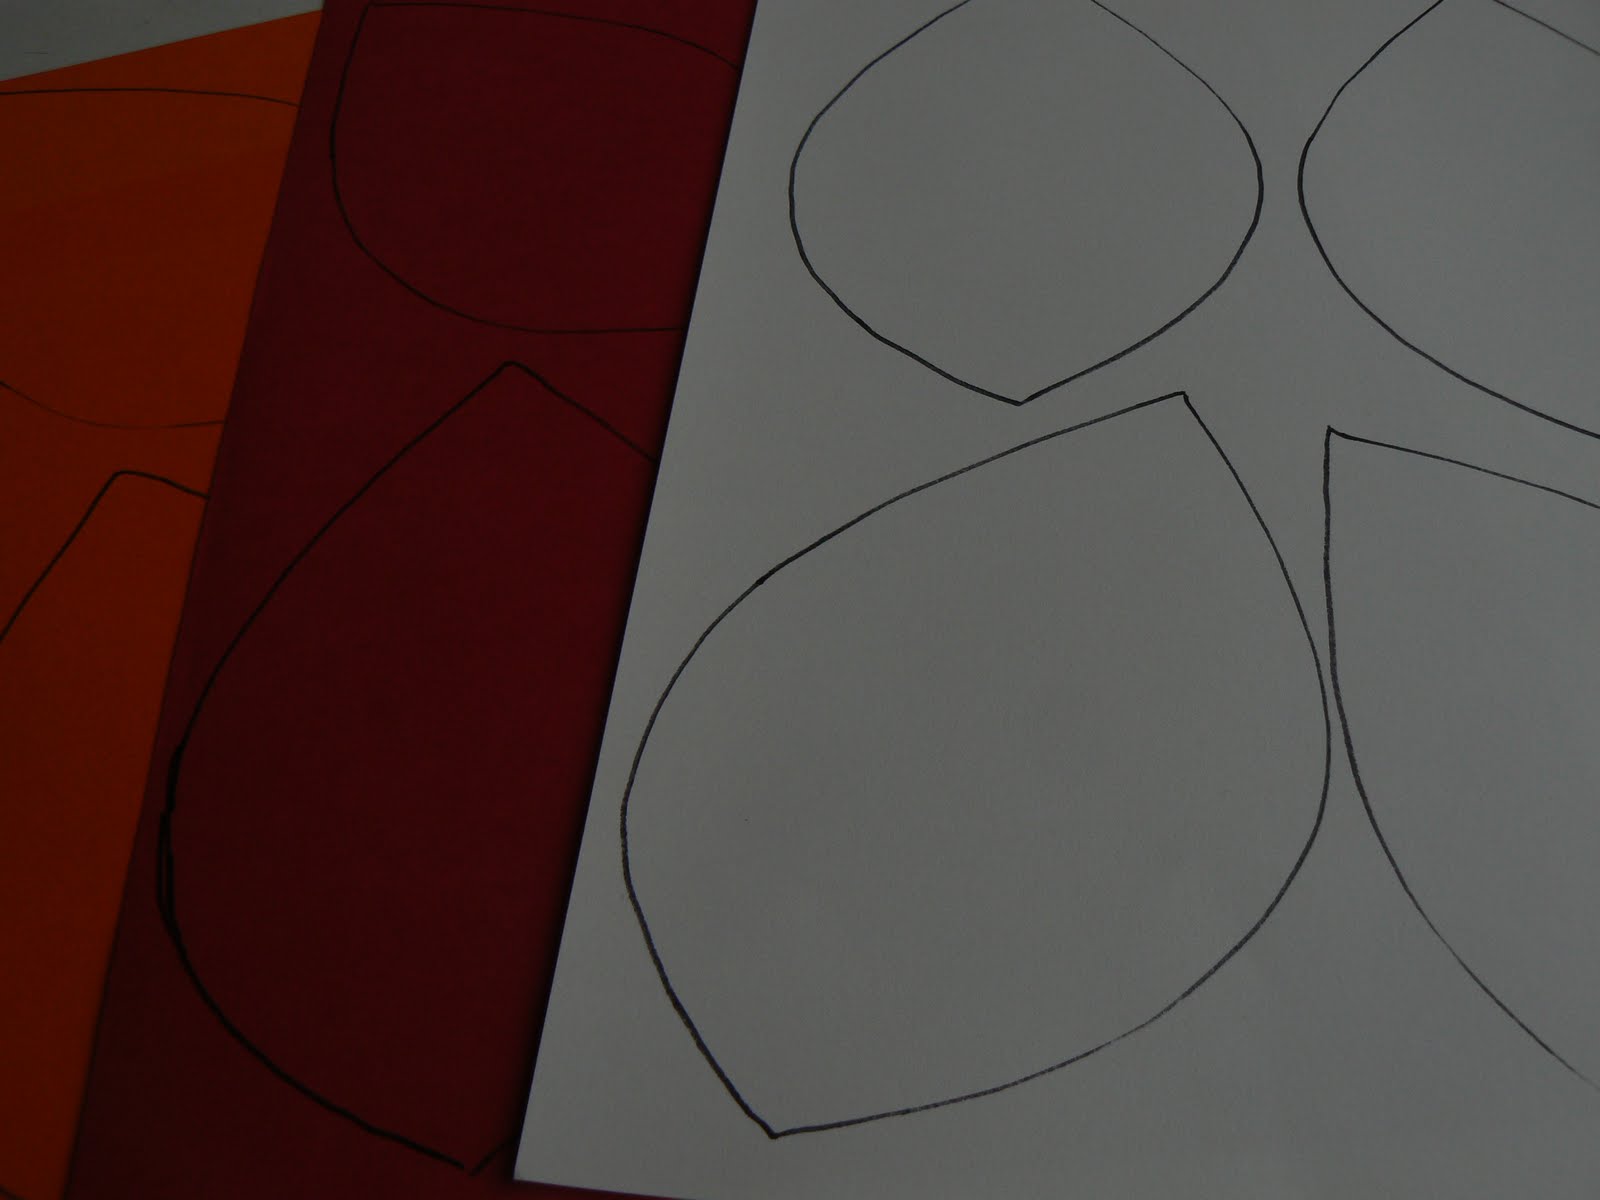
I choose to make this mini scrapbook in a leaf shape. I wanted to be sure that my polaroid peeks would fit, so i placed one polaroid on the paper and drew a leaf around that.


Cut out the shape you like and use the first one as a model (this way all your pages will be all the same size). I used red, white and orange paper and drew the leafs with a marker. Cut all the leafs out of your paper.

Here are all the leafs and i made one from felt. This one is going to be used as front page!
Make one hole in the top of al your leafs with your crop-a-dile.

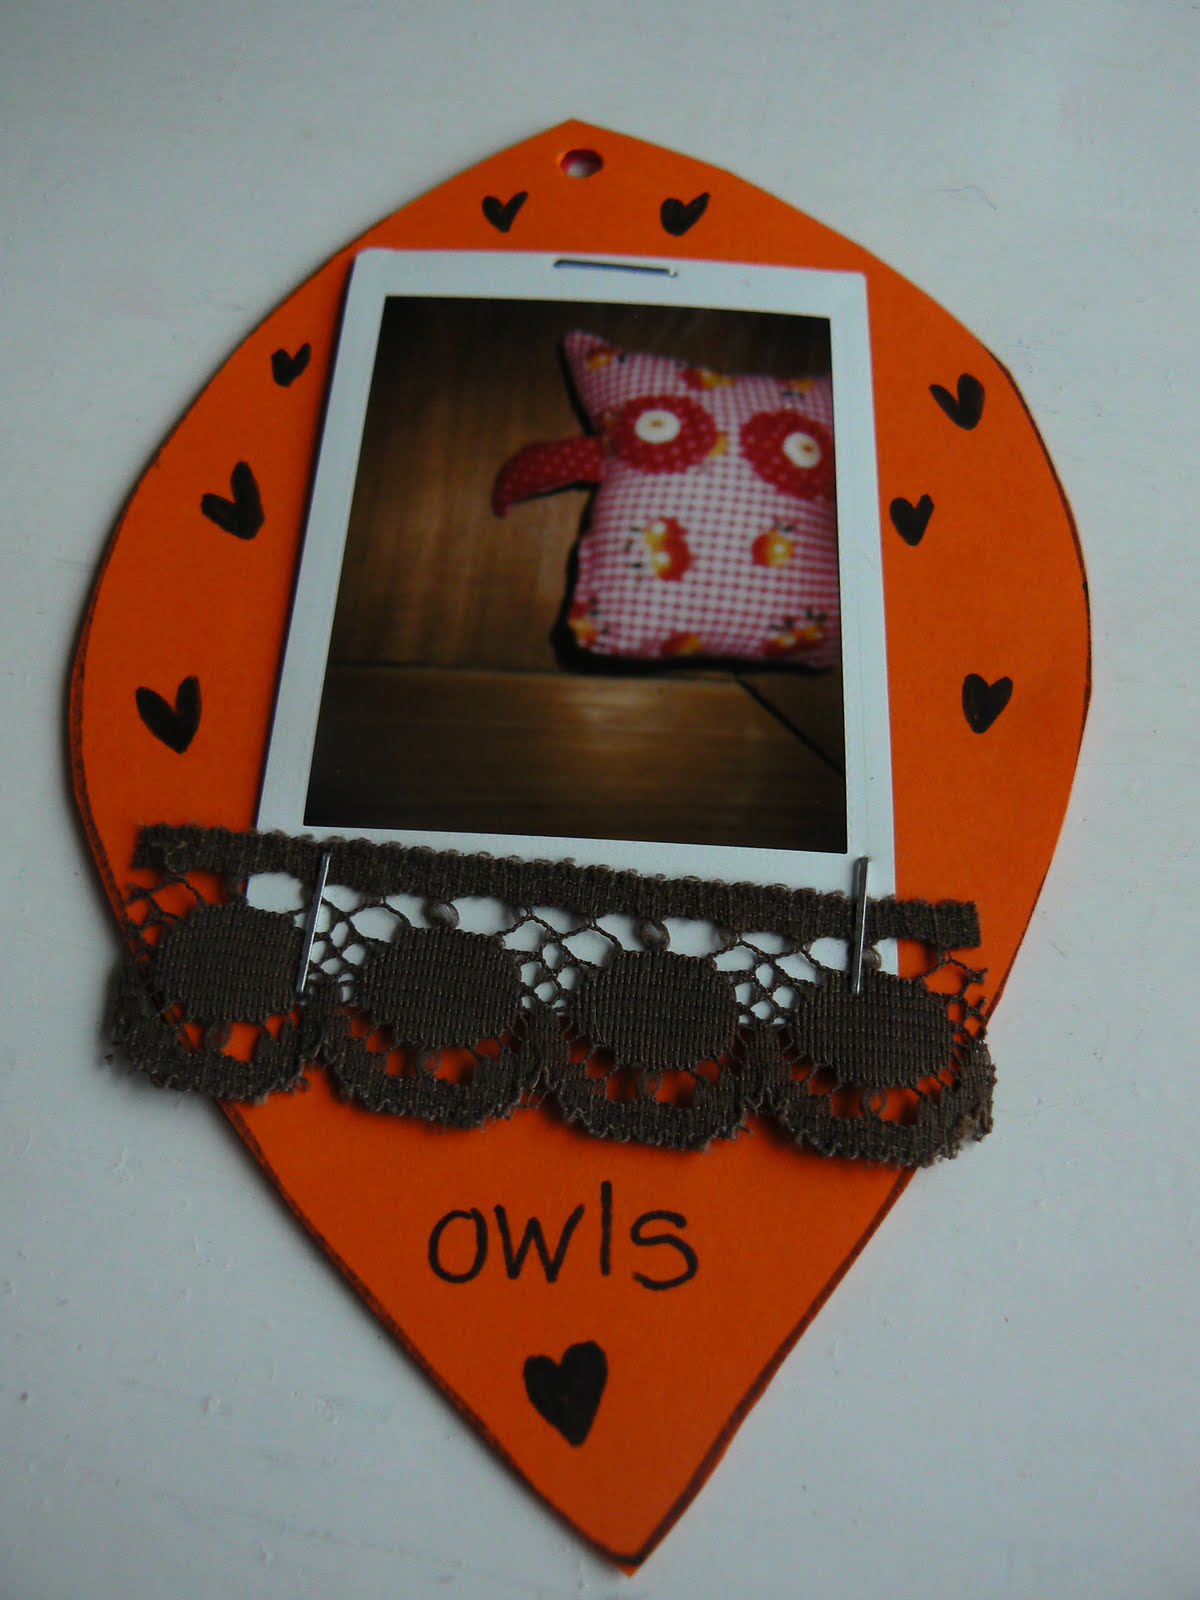
I used a cute fall decoration and stappled it with a brown piece of ribbon on to the front. I also added the month and date on the leaf! Now it's time to fill your leafs with: photos, fall decorations, favorite things to do during the fall, favorite fall recipes etc Here are a few of my pages...


When your done with your pages you can easily bind the leafs together with a cute ribbon and you are done!


Have fun making your own fall mini scrapbook!
XO. Vera

DIY -happy pencil-

It was a quiet week over at the birds blog and unfortunately i couldn't find the time to make a pretty DIY post, but today i have one for you! This one is very easy and just perfect for a little (holiday) gift or you can just make these pencils for fun with your kids or at a children party!

DIY -happy pencil-
Supplies:
- chenille thread (thick or small)
- feathers
- pencil(s)
- crafting glue
- (little) pompoms

1. first wrap the chenille thread around the
end of your pencil (make sure it's tight, so that
it doesn't fall off!)

2 Grap the other end and make a little round,
put the feathers in the hole and confirm it tight.
I wrapped it around the other chenille thread,
because in my opinion it better secure this way!

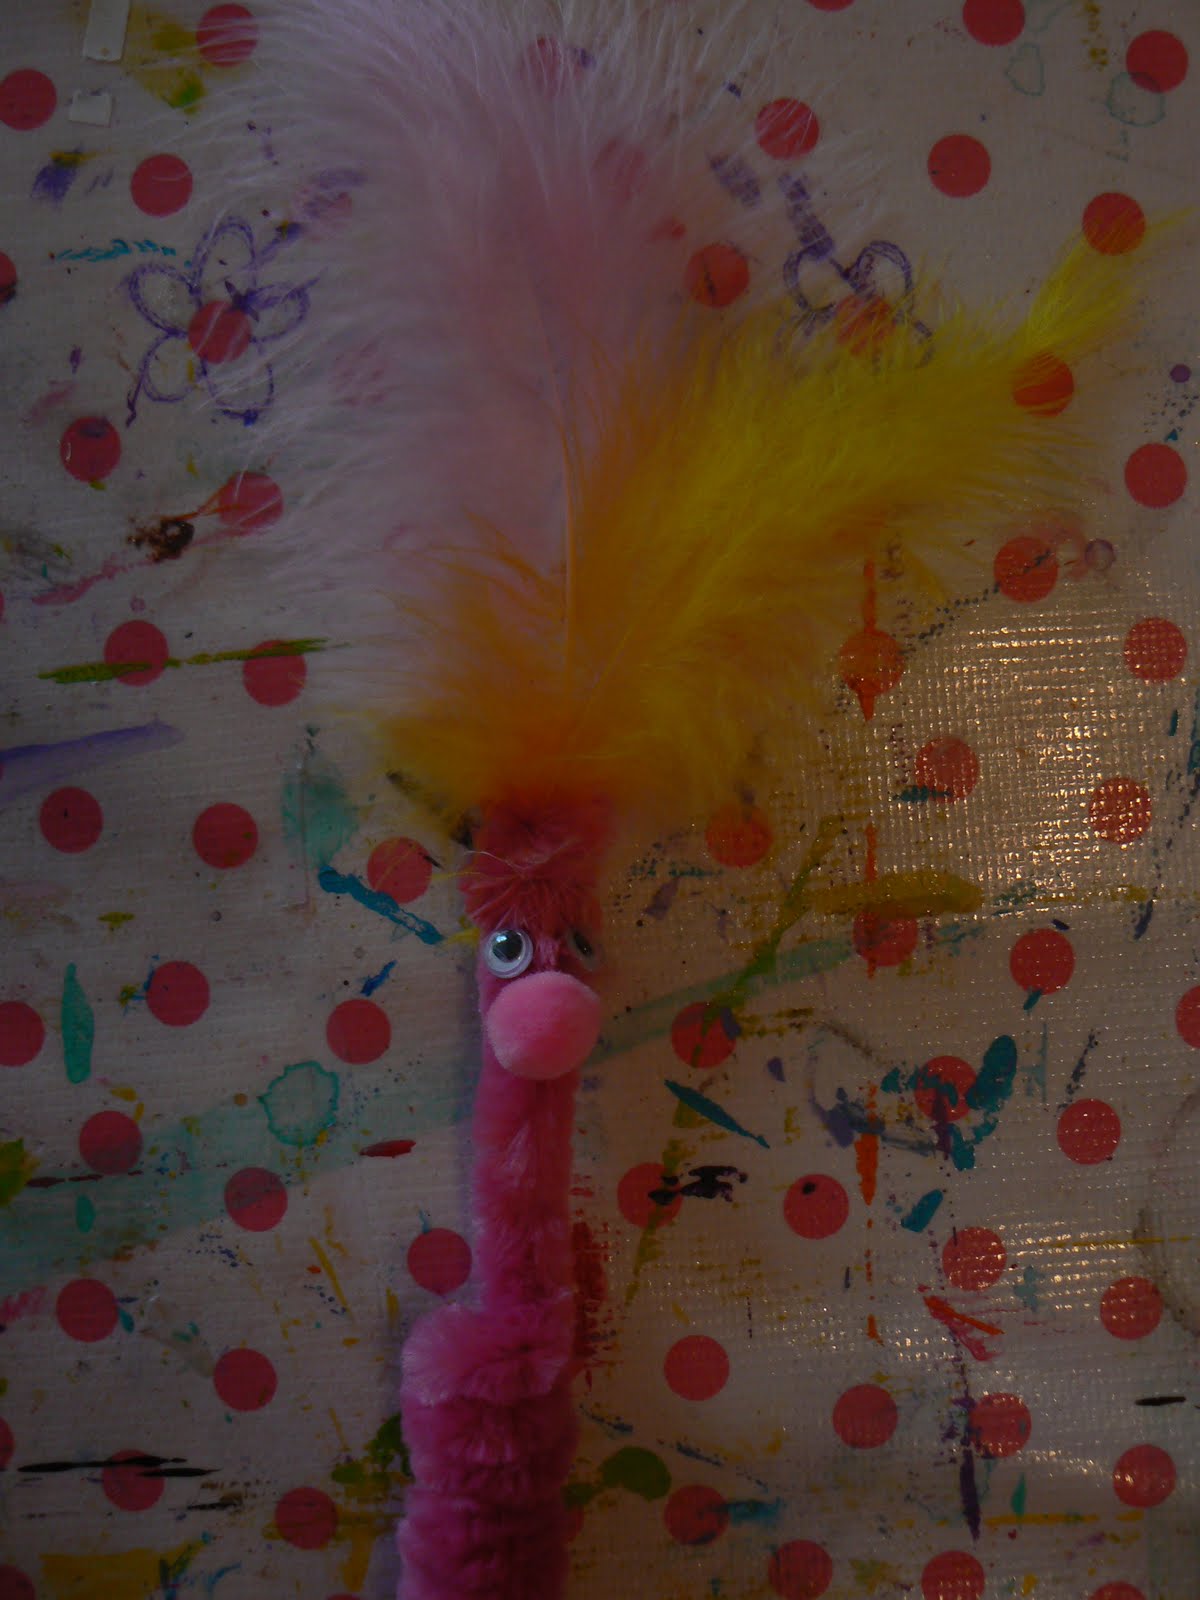
3 time to glue the eyes and nose on!

4. your pencil is ready to be used!

aren't i sweet?

Have fun crafting!

XO. Vera

DIY -make your own fall wreath-

My post was supposed to be ready yesterday, but i didn't have time to actually make a wreath. So i waited for today to make one :) Here we go...

You will need:
- a styrofoam wreath
- pins
- scissors (and if you like pinking shears for the fabric)
- fabric (i used an old fleece blanket)

Cut the fabric in slices and roll it on to your
wreath. Make sure that there are no blank
spots in between and that it covers your wreath.
Confirm the end and if you like the beginning with
a pin. Now you have the basis of your wreath.

Instead of using a ribbon i made a crochet one

Now it depends on what sort of wreath you
would like to make! Maybe you want to make
a pompom wreath or a polaroid one... I started
making polaroids that are fall inspired but i only
have a few so far... So i decided to make a wreath
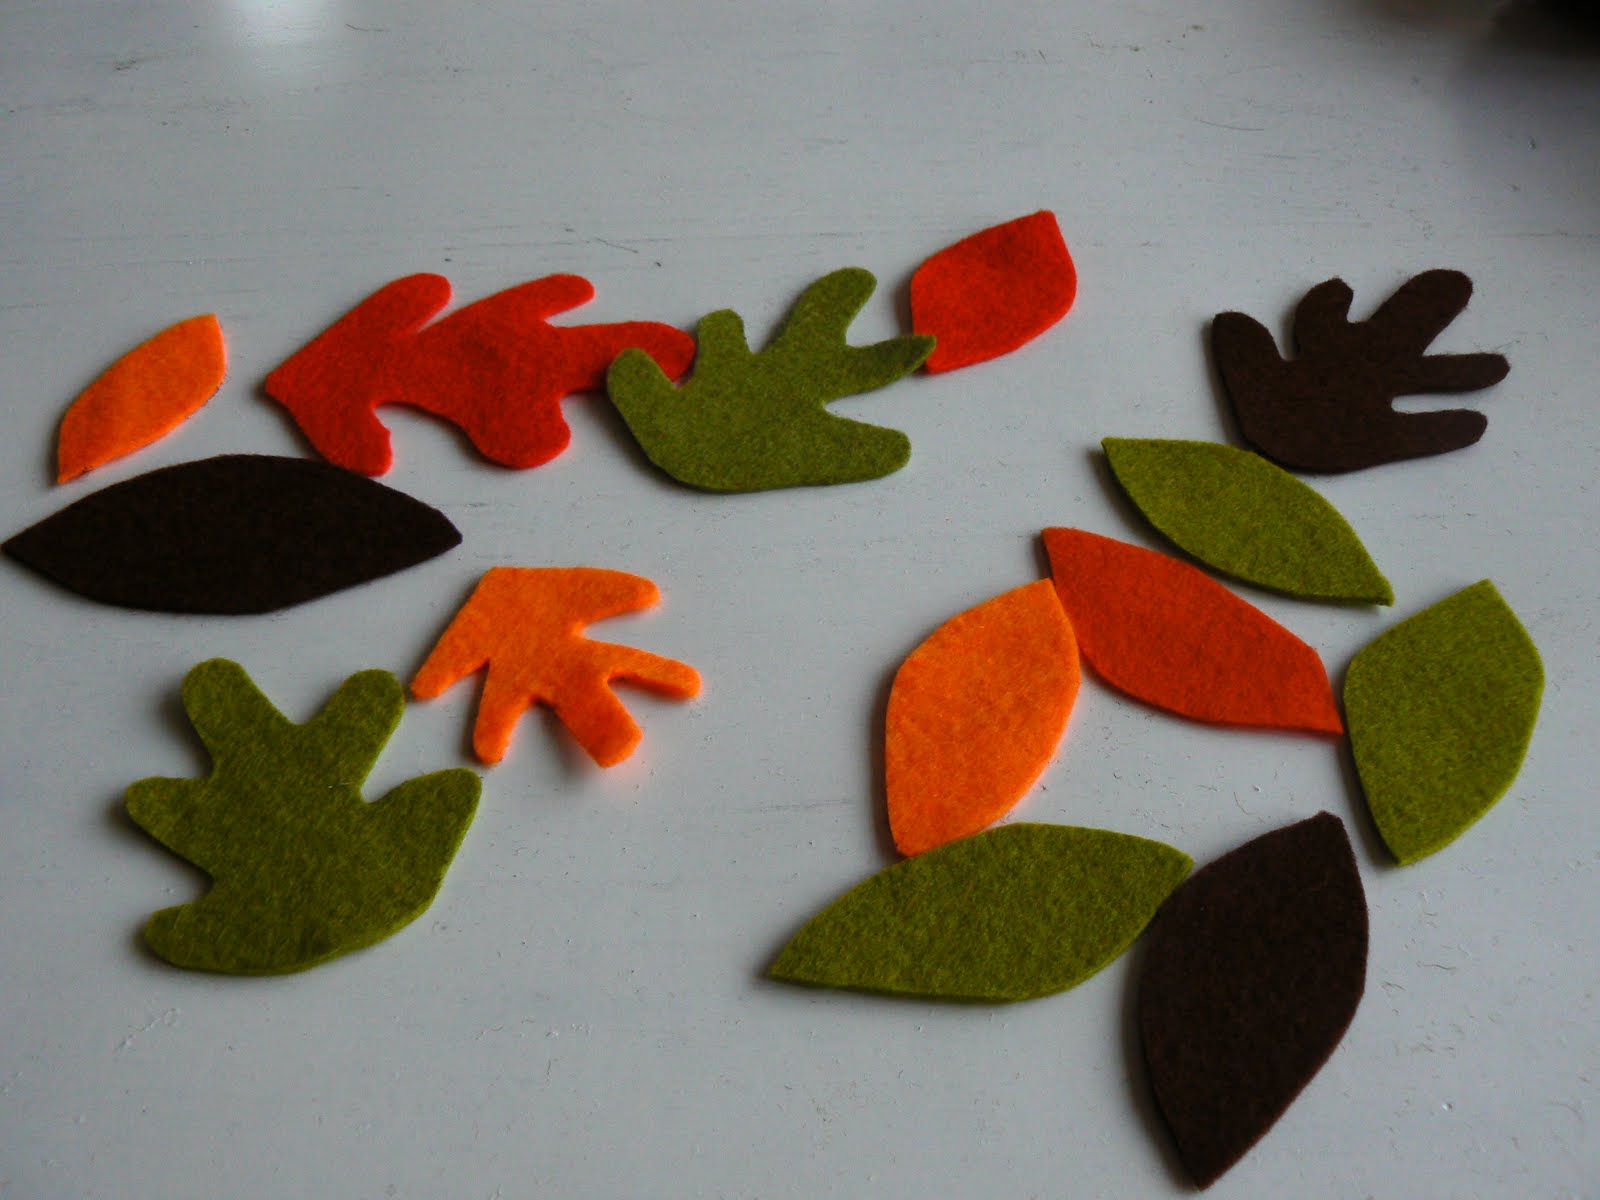
with felt leafs. It's also possible to make one with paper
leafs! I used felt in the colors: orange,
green, red and brown. I usually start cutting all
kinds of shapes, but if your not comfy that way,
just use a marker and draw leafs before you cut
them out ;) Use good scissors!


a collection of my leafs

i first used these shaped leafs
and then i used the other shaped
leafs to fill the whole wreath
i secured them with a pin and
made sure that you can't see
the pins on top.

i found some cute fall brads in my stash,
that i decided to use

i used them to secure two leafs together.

I used all the other leafs to fill
the wreath just the way i like it!
I only filled the front, but if you
like you can also fill the sides too.

Have fun wreath making!
XO. Vera