Showing posts with label flowers. Show all posts

DIY -restyle your empty bottles or jars-

Wowie i just saw that we've have 100 followers!! Maybe time for a little blog party soon?!

I have a lot of empty bottles from juices or jars that were filled with food. Usually we through them away in special glass containers, but before i through them away i always look if they can be used as a little vase. I keep the pretty shaped ones and although i like them just the way they are, it's also nice to give them some color from time to time! And this is how we are going to do this today...

DIY -restyle your empty bottles or jars-

Step 1 supplies
You will need:
-an empty bottle or jar
- some pretty papers
-buttons (medium or big)
- scrapbook flowers in different colors
-raffia, yarn, lace
-double sided tape
-siccors

Step 2
I used pretty Japanese paper that i usually
use for origami. See if your paper fits the
bottle. If not cut the piece off that you don't need.

Step 3
Use your doublesided tape and secure it
on the back of the paper, like this. Take

step 4
You can choose to do your bottle
half with paper or all round.
If you want to make it all round,
you can do that at once if your paper
is big enough or in 2 parts (like i did).
Make sure that they are at the same
height, by starting were you've
ended.

Step 5
Make a little flower just for decoration.
I used a piece of lace that i normally use for
making necklaces :) Pull it through the flower
and then the button. Confirm it on the bottle
were you like and make a knot.

Step 6
You're done!

If you want to use it as a vase,
be careful when you put water in it!!
It's still paper and it would be a pitty
if it got wet ;)

Did i inspire you enough to make one of your own?

XO. Vera

DIY - make your own jar lantern-

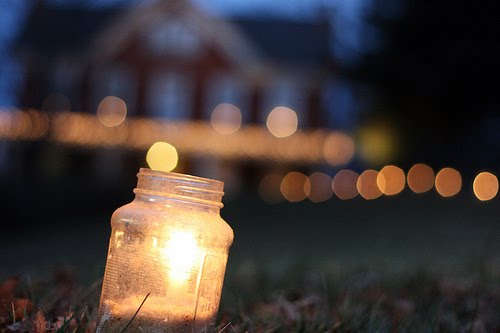
Hi :) I'm happy that the internet is working again! A few hours ago i wanted to make my post and couldn't get any connection... so i'm happy that it's working now xD For today i have made a summer feelin' DIY. I just adore jars that are being used as little lanterns. I still dream about a tree in my garden that's filled with lantern jars... Light them and just have a romantic evening!


Supplies:
-jar
-wire
-buttons/scrapbookflowers
-scissors (i used my special jewelry pliers)

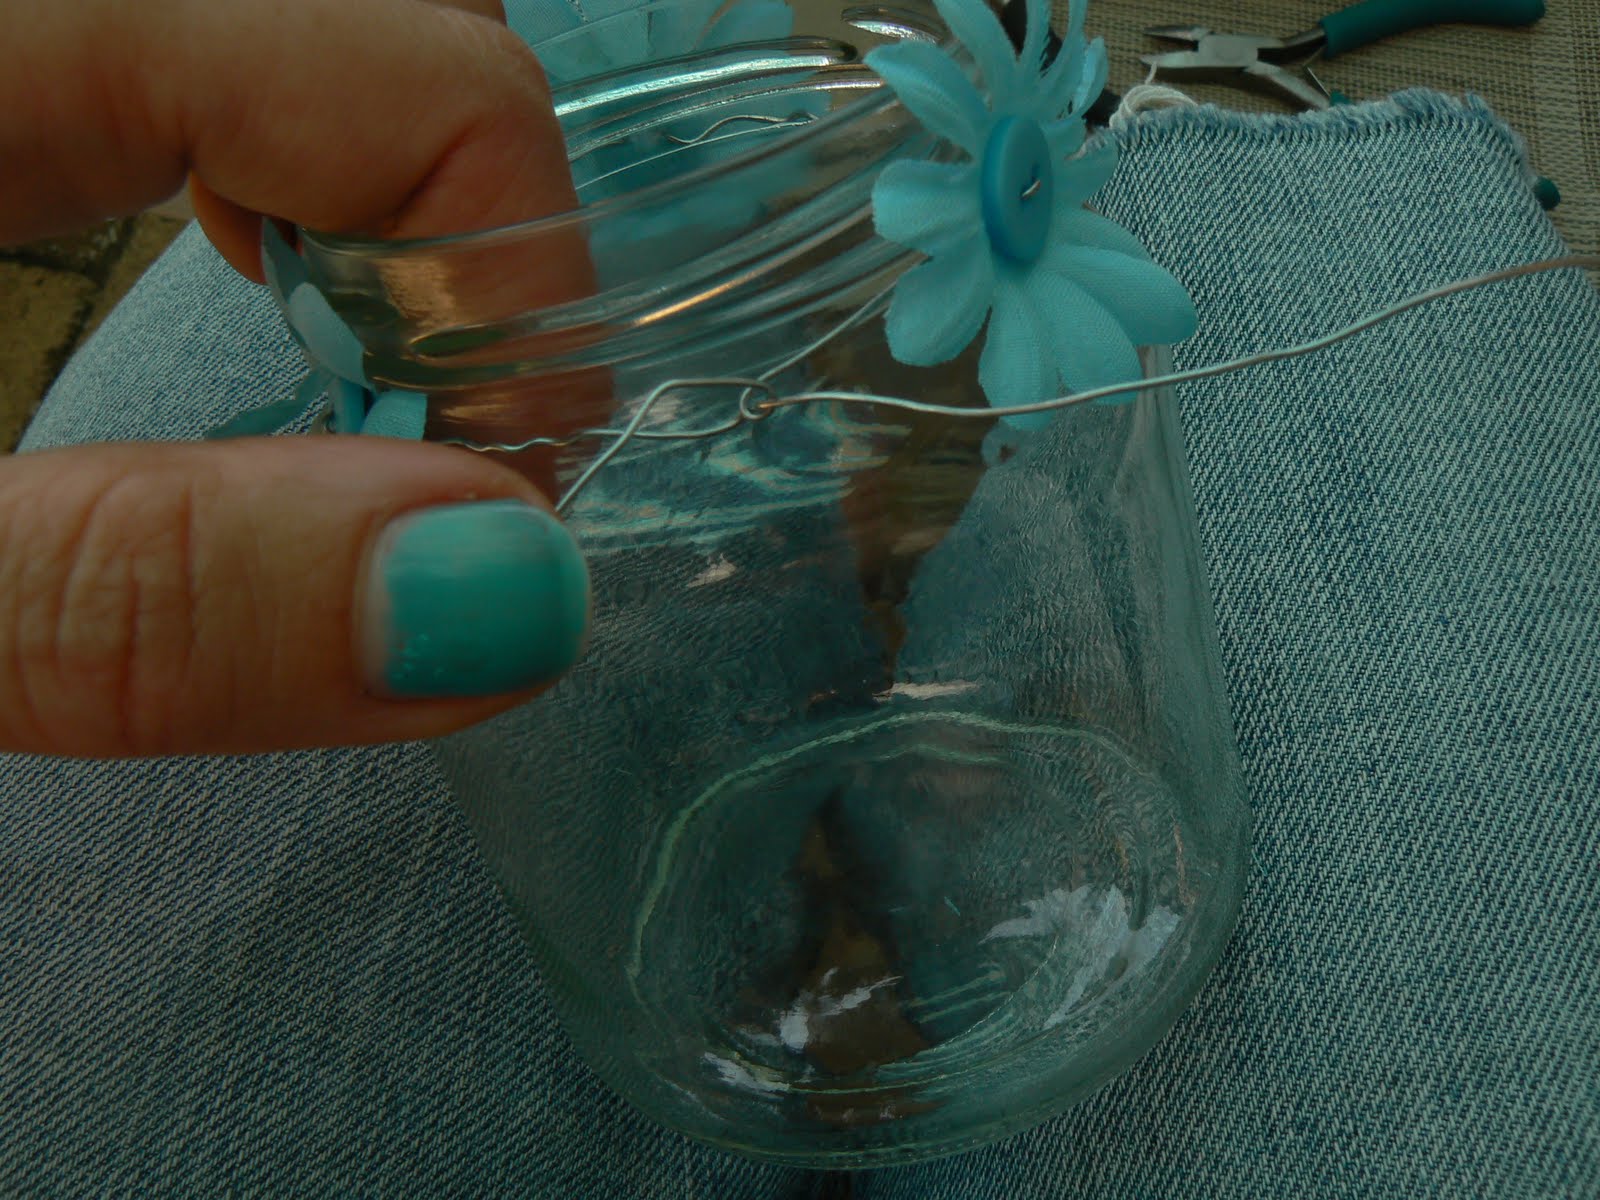
1. Wash your jar and soak the label off. Cut a piece of wire long enough to twist around the rim and secure it firmly.

2.Select the buttons you want to use & pull the wire through. If they have shanks, give the wire a little twist at the back to keep the buttons in place.

3. Wrap the line with flowers and buttons around the neck of the jar & fasten the wire by making several twists.

4. I used the same wire to make a handle, but you can also use a new piece of wire. Twist the wire and hold it in place securely and then twist it on the other side and your done!


5. If you like you can also paint the glass with special paint (i did by making little blue flowers).

Other ideas to use your jar for:
-use them as storage for your collections of buttons, shells, sea stars etc
-use them to make a gift (make your own jam, put candy in it, make a little vase)
-make several & hang them in your garden or place them on a table


Have fun making your own!
XO.Vera

a quick hello

Today went by fast. Far to fast. It is bedtime already and I haven't even blogged.
So today just a quick hello from me and the Lupins from my garden.

Come and say hello


It has already been two months that I showed you the first flowers of spring in my garden. These last two months I spent more and more time in the garden. All the sun and rain is doing the plants well. Both the ones a I want and the ones that don't belong in my garden. So I have done a lot of weeding, planting, replanting and seeding.
I dedicated the front part of the garden, closest to the house, to edible herbs. Some of them already started to bloom. Since I don't really need all the herbs to eat, I let them bloom for the biggest part and keep just a little bit free of flowers, so I can eat them too.
The back of the garden is one big wilderness. Last year I took some different seed mixtures, both with indiginous and cultured plants and just trew them in the garden. The result was beautiful! All summer long this part of the garden was full of flowers and buzzing with bees. This year I try to get mostly indiginous species. So again I trew in some seed mixtures, but this time only with plants that belong here.
Well, I think I have talked enough now, let me take you for a little walk in the garden.


DIY -flowers part 3-

Well hello, we meet again :)
Today we're gonna make some flowers, ready?!

I've used: plain chipboard, felt, plastic, paper, woodgrain (adhesive foil),
acrylic paint, a paint brush, buttons, hotglue gun, and embroidery thread.

don't you just like a plate of those :)

These are all the flowers that i made!

1. your own flower paper, that you can use for scrapbooking!
I used a white printing paper and painted flowers and dots with acrylic paint on it. I find it easier to paint a bigger paper at once than a few little ones. Once you're done just fold your paper and cut it in as many pieces as you want! I made a very easy background this time, but you can make it with bigger dots, hearts etc.... have fun :)

2. a plastic flower with button
Find some firm plastic, draw a flower, cut it out and paint the edges with acrylic. If you like you can sew or glue a button in the middle.

3. a flower from felt with button
Choose a color of felt that you would like to use, draw a flower, cut it out and sew a pretty button in the middle.

4. a woodgrain flower with button
I've used one white printing paper and some self adhesive woodgrain foil. The woodgrain foil is sticky, so it's easy to paste it on the white paper. Then i drawed flowers on the woodgrain, cut them out of the paper and added buttons in the middle with my hotglue gun.

5. a chipboard painted flower with button
Find some chipboard (you can even use a empty rice box if you like) and draw a flower on it & cut it out. I've used a lighter purple for the flower and also a darker one for the edges ;) Add a button and you're ready.

You can make a cute scrapbookpage with
your handmade flowers :)

These are my woodgrain flowers :)
I used several to make a cute little photoframe and
i also used one as a hairdecoration!


I hope you have enjoyed this post :)
If you have any questions just leave a comment!
Wishing you a lovely day :)
XOXO.
Vera

DIY - flowers part 2-

Hi :) I hope you're enjoying our creative blog! Last week i showed you how to 'pimp' your t-shirt with a flower ribbon. Today is part 2 of my little DIY serie about flowers. The coming weeks i will keep on showing you how to make (simple) flowers with different materials. This week i used crepe paper, but you can also use normal paper or blotting-paper or make a combination with them. I also made a paper giftbag. Cute to use as a pretty- little-garden-spring gift with bulbs inside ;)

DIY -flowers part 2-
Make your own crepe paper flower
& papergiftbag

Supplies for the flower
-siccors
-crepe paper
- brads
- marker/pencil

Supplies for the paper bag
- paper/ wrappingpaper (not to thin)
-crop-a-dile
-some ribbon
-eyelets

Just draw as many flowers as you like on the crepe-paper and cut them out. Then use two or three of them and secure them with a (cute) brad in the middle. I added my flower on the little paper giftbag that i made. There are a lot of different ways to make your own paper bag. If you do like to make one yourself i've found a few internet sites! You can look here , here or here.

I made holes on top of my bag with the crop-a-dile and used eyelets to make it pretty. A little cute ribbon to finish your bag & add a giftcard if you like.

I also found this site, it's just perfect if you don't know how to make your own! Click on the bag you want, just print the one you like and glue the prints together.

You can make as many flowers as you like and use them in your scrapbookalbum, on a gift, add them to a giftbag etc. If you made a prettty little giftbag or flowers, feel free to post them on our flickr site, here's the link :)

ta da, your giftbag is ready madame!

one of the printable bags, look here

i also found these pretties on Etsy


The last two peeks i found on weheartit, just a little more paper flower inspiration :) Anyone interested in a origami flower post?? Just let me know :) I hope you have enjoyed this post & see ya next week!

XO. Vera

Quick Spring Freebie! :D


Hi everyone!

Well, my favorite thing about spring is the cute, fun pastel colors! And I also love flowers, and cupcakes, so I thought I'd offer up these cute cupcakes toppers that I drew up for you all to download! (Yes, these are the same ones I posted awhile back on Katie's blog, Punk Projects, but I figured it wouldn't hurt to give them to you all, too!)


So here they are! Download the PDF here at Mediafire, and then you can follow my tutorial to turn the little images into cupcake toppers!

I hope you have fun with these! Make sure you post pictures of your cupcakes in our Flickr if you use them! :D

green fingers

My favorite thing about spring? Fresh flowers in my house!


Spring is the time my green fingers start to tingle. This is about the only time in the year I willingly pull the weeds in the garden. But the best part is the sowing and planting. Not only the garden gets a spring make-over, my house gets one too.
First, my plants get some fresh soil, fresh air and fresh water (whenever possible I leave them out in the rain for a while).


In the meanwhile I clean the windowsill (and put some 'fresh' LP's in the windowsill).


I also like some new life. This year I sowed peppers, tomatoes, and some herbs. I used old toilet paper rolls to put the soil and seeds in. Put in a small layer of water, they are great for germinating the seeds.


Last of all, my fresh herbs got a new bowl and a sunny, but not too sunny spot in the windowsill in the kitchen.

Easter & DIY -flowers part 1-

Hi :) I can't believe that it's almost Easter already :) The question of the week is: What's your favorite way to eat your Easter egg? Quite boring ha ha just boiled or scrambled with some salt on a baked baguette hot from the oven, yummie! I love the Easter breakfast with my sweet husband or with my family. We ususally brunch together at my parents house. I also love love love eating chocolate eggs. My fav's are: cappucino, white or dark chocolate with some orange pieces in them :)

When we were little, my parents hid the easter eggs everywhere in the house & it was always so much fun finding them! I hope to do this in the future with my own kids ;)

As promised i would show you ways to make flowers with different materials! Easter, spring and flowers all belong together in my opinion. That's why i made a mixed post today that i hope you like :)

DIY -flowers part 1- Make your own flower t-shirt

You will need:
a t-shirt,
ribbon with flowers,
embroidery thread
and needle.

I bought my ribbon with flowers at the market. If you can't find any you can also use a pompom ribbon or any other cute ribbon that you might find! By hand you will be adding it to your t-shirt. Make sure that you work only through the ribbon part and not through the flowers! Just make sure that it's secure. I also made a little hairpiece with my leftover flower. I made two leaves from green felt and sewed them together with the flower. Then i used my hot glue gun to add it to my hairclip :)

ta da... your outfit is ready!


I found lovely photos on wehearit for just a little more flower and Easter inspiration :)


Wishing you a happy Easter!

Love,
Vera

Sunday DIY - Fabric flowers

Happy Sunday!

Today, I would love to share a very cute and also (as usual) very simple DIY:


This cute fabric flower could be used as a pin or a brooch or even as a cute hair accessory. Just see how it's made:

You will need fabric, scissors, thread and a sewing needle. And a button, if you want to. :)

First, cut straps from your fabric. I cut 3, but actually only used 2 in the end ^^

Then, fold the first strap to half.
You can iron it, but no need to. :)
Then, take needle and thread and sew along the open end, using a loose stitch.


Once your strap is all "closed",

pull the thread.

There will magically be a ruffle.
And it already looks like a flower, doesn't it?! :)

Now, you can sew the open ends together to make it look more like a circle/flower.
Don't cut off the thread! Take the second strap, fold it to half and start sewing it onto the ruffle/flower using the loose stitch again.

Once you've reached the end of your strap, pull again and you have a second ruffle.
It may take a while, but try to stretch the second ruffle a little bit so it will be wider than the first one.

Sew the ends together again.
At this point, your basic flower is finished!

I thought a button in the center of the flower would look cute.
And I was right, mh?! :)

Those flowers are so much fun and so easy to make! I suggest it's a perfect Sunday evening craft ;) Hope you like this cute idea and have fun creating!

Loves,
Katja