Granny Squares!

Want to add some color to your home? Try granny squares!!
 
Ideas for use around your home:
Add some colorful coasters
Cover an old chair!

Make a throw blanket

A basket for anything :)

A rug to brighten up the floor

Throw pillows or chair cushions

SHOES!

Or how about a necklace?
 (click on the images for sources)

So many fun ways to use them!! Amazing, no? Choose your favorite colors and get started :) Maybe white and an accent color for your home, maybe neutrals, maybe rainbows! What would you prefer? Show us in our Flickr group!


It's my goal to learn to make granny squares sometime during the summer. I'm still crazy busy, but I'll fit it in somewhere! :) Wanna learn with me? Check out these awesome tutorials on how to make them:
Katja's tutorial
How-to, even if you've never knit before! on Meet Me at Mikes
The Purl Bee's awesome granny square tutorial
HEXAGON granny squares from Attic24

Friday Recipe for the Weekend

Chicken
Ingredients:
Chicken's breasts (with skin)
6 Shallots (in cubes)
Season (Paprika, Ginger powder, salt, black pepper, chilli sauce, chilli powder - or anything that you prefer)
Oil or Olive Oil
How to Prepare:
Just season the chicken at your taste and add the olive oil and the shallots and take to the medium oven for about 2 hours or until you see that the chicken is nicely cooked. You can add some chicken stock dissolved in hot water for quickly cooking process. Serve when done.
Mash Potatoes
Ingredients:
Potatoes
1 tea spoon of butter
3 tbs of grated cheese (any type)
2 tbs of mayonnaise
How to Prepare:
Peel the potatoes and leave it to cook until they are very smooth. Drain the water and start the mashing process (I normally use a fork - because I like to feel some potatoes parts), add the butter, the cheese and the mayo and mix all together very well. Keep it warm to serve.
White Rice
Ingredients:
1 small onion finally chopped
2 tbs of oil
1 tea spoon of salt
2 garlics finally chopped
1 mug of white rice
2 mugs of boiled water
How to Prepare:
Put the onion, garlic, oil and salt into a pan (small one) and let them gold - be careful to not let it burn! Add the rice, mix and than add the water. Mix once again and leave it until the water dry out. I normally leave about 10 minutes inside the oven (don't turn it on!) just to dry a little bit more for itself. Serve.
Vinaigrette's Sauce
Ingredients:
Tomatoes
Onions
Parsley
Olive oil
1/2 tea spoon of salt
vinegar (until half way of all contents)
1/2 mug of cold water
How to Prepare:
Finally choppy all the ingredients and mix all together. Be careful with the vinegar as you could do a stronger or not that stronger flavour. The water is just to manage the strong flavour of the vinegar. Leave at the fridge and serve cold. This type of sauce is a good combination with BBQ and there's a lot of ways to do it so... Search for more around the Internet!

DIY -Paint your own mug, coffeecup or bowl-

For today i have a cute DIY :) I've painted several things over the years & especially for today i've painted these coffee cups. This way i could show you how it works step by step!


What do you need?
- coffee cups (or some other china that you like to paint)
- black china paint (you can also use a special porcelain painter (marker))
- small brushes
- carbon paper
- white paper
- ballpoint/pencil


- draw the moustache with a pen or pencil on a piece of white paper
- put the carbon paper behind the white paper
- use tape to secure it to your cup
-check if the right piece of carbon is on the cup
- take a pencil or ballpoint and go over the lines that you
have already drawn
-when your done, take it all off
- if you did it right.. there are lines!

If you don't have any lines, the carbon paper was on the
wrong side, just do it over it over again on the right side!


paint them & let them dry
When the paint is dry and you don't like
what you have made, you can just scrape it off
with your nails or a little knife.
This is also the way to remove some paint
that was a little over the lines!

My cups are ready to put in the oven for half an hour
on a temperature of 140 degrees!
Read on your paint jars what they write about
how your paint will stay on permanent!!

I looked back in my photo's to show you
some of my other creations :)

There is a little difference when you make these!
Instead of painting directely you first
make all the lines black with the china paint
& a dip pen. The reason that i use a dip pen,
is because you can make fine lines!
Let it dry and then paint with a small brush
all the colors that you like inside the lines ;)


I hope you like this post &
feel inspired to try it yourself!

Next week i will not be here
to post :( I'm going away for
a week & where we are i don't have
any access to the internet!
I'm really curious... a week with no
internet, blogging etc OMG :P

Love,
Vera

Perfect for Summer: Cutout Dresses

Hi Guys, & happy Wednesday!

I've been swooning over the romance of cutout dresses lately. NO! I'm not thinking of this kind of dress. I'm thinking of the more refined variety. Trust me, you can {and should!} totally rock this look!


I'm into it because it's sweet and just a little sexy. Plus, it's kind of a surprise because with a lot of these dresses the front is conservative, making the cutout even more unexpected. Perfect for a date night or a weekend getaway with friends.

Blue Floral Dress, $37
Blue Pinstripe Dress, $58
Orange Sherbet Dress, $68
Striped Dress, $165


Happy Shopping!

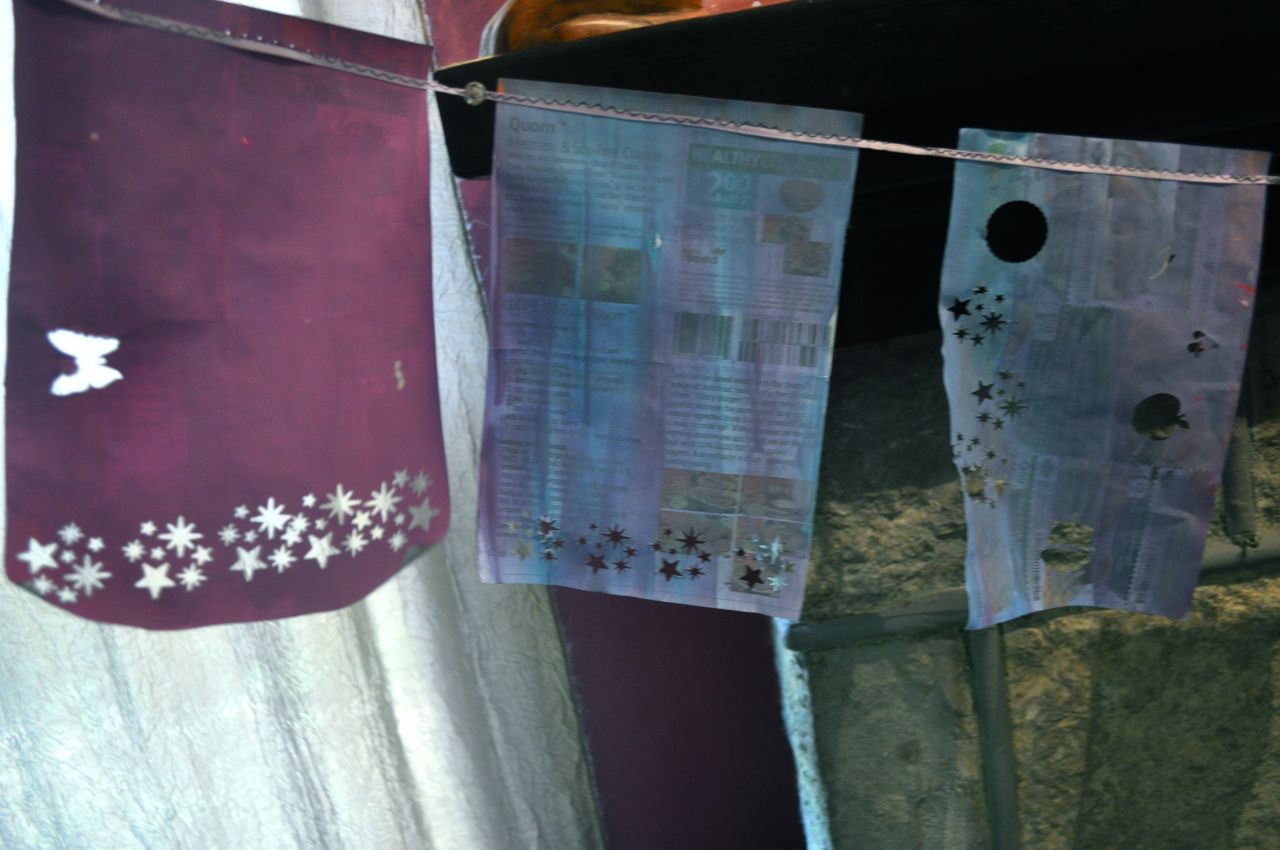
Junk Mail Garland--Perfect Decor for a Jammie Party!

While browsing The Crafty Crow for ideas, I found the best tutorial for Junk Mail Garland!

I usually have a giant pile of junk mail on my side table...I have to force myself to go through it to sort out the 'recycle', 'shred', and 'important stuff' into piles.

Recently my niece stopped by and wanted to paint.....hmmmm....I am an art teacher, but rarely do I have the supplies on hand for kids to get artsy crafty at my house, but luckily I had just read this amazing idea from Scrumdilly!

Quickly, I squirted some paint onto paper plates, snipped my junk mail into not-so-even sheets and let my niece and neighbor's daughter go to town painting the junk mail with pretty paint colors.

The paint dried quickly so I was able to bring out my paper punches and let them start punching fun shapes out of the garland.

While we did everything in less than an hour, we kept it fairly simple, but with a bit more preparation, you could use crazy scissors on the bottom edges or you could just cut it in waves like the tutorial shows....this garland would even be beautiful with some glitter! I didn't bother with that.

Later that night, once all the paint was dry, I used a long bit of ribbon to stitch the paper together to make garland.
Why would I need to create all this garland? Well I was planning a 'jammie party' with all the kids in my family for Saturday night and we needed decorations of course!

After creating one long piece to go across my fireplace, I took the pieces that were left over and punched holes along the top edge. When kids started arriving at the jammie party, I let them 'stitch' ribbon through the holes (over-under technique...even my 4-year old niece could do it!) and we hung the mini-garland pieces around the doorways at my house.

Supplies Needed:
Junk mail
paint
brushes
punches
ribbon
This was a really easy and fun craft project to do with kids...the garland was perfect for 'Our Rockin' Jammie Party'!!

It was super fun! We made chocolate covered strawberries, played games like Pictionary and charades, made popcorn and pizza and watched UP, tie-dyed shirts, this morning we ate waffles, played more games and went on a fun walk around the neighborhood.

DIY Sunday: Flower Brooch

Hey everyone! :)
I hope you are having a wonderful Sunday. I am having a fabulous one with lots of sleep and some creative fun. One of them was this cute little project I want to share with you:


It's a cute little flower brooch! YAY :D Perfect for warm spring days.
You will need:
fabrics in different colours and patterns
green felt
sewing machine / sewing needle & thread
pin

First, cut 3 x 2 circles from the fabrics you want to use.


Facing each other, sew 2 circles together. (repeat for all circles...) Leave a bit open to turn the circle inside out.
Like this!

See? :)

Once you have finished your three circles,

turn each one inside-out.


Three cute circles :D


Now, take one circle and fold to half.


Take another one and wrap around the first.


Then, wrap the third one around the other two.


Sew them together on the bottom of the flower.
Don't cut off the thread!


Now, cut a strap from green felt.


Sew it to the flower and start wrapping the felt around the bottom of it.


Use some loose stitches to keep the felt close to the flower ;)


Now, take a pin and sew it to the flower.


I'd suggest you better sew it to the top of the flower and not to the bottom like I did. Believe me, it will work better!


Now, your flower brooch is done!!!! YAY! :D


Hope you are enjoying our cute blog project! It's always so much fun reading the other girls' posts and feeling inspired everyday!

We love you.

xo.
Katja

Kaleidoscope of Colors

I love kaleidoscopes, don't you? No matter what jumble of parts is inside, it always looks beautiful because of the symmetry! So many bright colors :)
I recently came across an awesome site called Kaleidosketch. You must try it out! Here are a couple pieces I made just for fun:
There are some really pretty ones in the gallery of the site too:
You can change the central point by pressing CTRL and clicking. Leave a link to share what you make, or add images to our Flickr group! And here are a few pretty kaleidoscope images, courtesy of weheartit:
This last one is a structure by German designer Marco Hemmerling in Cologne, Germany. The reflected images constantly change as you move around it. And it's always colorful. Neat! Well, happy Saturday, and enjoy the colors of your day!