Showing posts with label crochet. Show all posts

Christmas decorations DIY: owl


Supplies:
2,5 mm hook
matching cotton yarn

Terms used:
ch = chain
sc = single crochet
dc = double crochet
dec = decrease, single crochet two stitches together
st = stitch

This pattern is worked in spirals. The rows are not closed. The new row starts in the first stitch of the previous row.

Pattern:
body:
ch2 (or use a magic loop)
1) 6sc in 2nd st from hook (or 6sc in magic loop)
2) 2sc in each st around (12 sc)
3) (2sc in first st, sc in next st), repeat around (18 sc)
4) (2sc in first st, sc in next 2 st), repeat around (24 sc)
5) (2sc in first st, sc in next 3 st), repeat around (30 sc)
6) (2sc in first st, sc in next 4 st), repeat around (36 sc)
7-22) sc in each st around (36 sc)
23) (dec, sc in next 4 st) in back loops, repeat around (30 sc)
24) (dec, sc in next 3 st), repeat around (24 sc)
25) (dec, sc in next 2 st), repeat around (18 sc)
26) (dec, sc in next st), repeat around (12 sc)
STUFF
27) (dec), repeat around (6 sc)
FINISH OFF

eyes (make 2):
ch2 (or use a magic loop)
1) 6sc in 2nd st from hook (or 6sc in magic loop)
2) 2sc in each st around (12 sc)
3) (2sc in first st, sc in next st), repeat around (18 sc)
FINISH OFF

ears (make 2):
ch2
2sc in 2nd st from hook
FINISH OFF

wings (make 2):
ch7
1) sc in 2nd st from hook, sc in next 4 st, 8dc in last st of chain
Keep on working in the established direction, the next stitches are worked in beginning chain
sc in next 4 st, 3sc in last st before the first st of this round
2) sc in next 5 st, 2sc in next 8 st, sc in next 4 st, (2sc) in next 3 st
3) sc in next 5 st, (2sc, sc in next st) 8 times, sc in next 4 st, (2sc, sc in next st) 3 times
4) sc in next 5 st
FINISH OFF

Make the pupils, beak and feet out of felt

Sew the wings, ears and eyes to the body.
Use glue to paste the pupils, beak and feet to the body.


Liever Nederlands? Het originele, Nederlandse patroon staat op mijn eigen blog.

Christmas decorations DIY: christmas tree


Supplies:
2,5 mm hook
matching cotton yarn

Terms used:
ch = chain
sc = single crochet
dec = decrease, single crochet two stitches together
st = stitch

This pattern is worked in spirals. The rows are not closed. The new row starts in the first stitch of the previous row.

Pattern:
Tree:
ch2 (or use a magic loop)
1) 6sc in 2nd st from hook (or 6sc in magic loop)
2-3) sc in each st around (6 sc)
4) 2sc in each st around (12 sc)
5-6) sc in each st around (12 sc)
7) (2sc in first st, sc in next st), repeat around (18 sc)
8-9) sc in each st around) (18 sc)
10) (2sc in first st, sc in next 2 st), repeat around (24 sc)
11-12) sc in each st around (24 sc)
13) (2sc in first st, sc in next 3 st), repeat around (30 sc)
14-15) sc in each st around (30 sc)
16) (2sc in first st, sc in next 4 st), repeat around (36 sc)
17-18) sc in each st around (36 sc)
19) (dec, sc in next 4 st) in back loops, repeat around (30 sc)
20) (dec, sc in next 3 st), repeat around (24 sc)
21) (dec, sc in next 2 st), repeat around (18 sc)
22) (dec, sc in next st), repeat around (12 sc)
STUFF
23) (dec), repeat around (6 sc)
FINISH OFF

Stem:
ch2 (or use a magic loop)
1) 6sc in 2nd st from hook (or 6sc in magic loop)
2) 2sc in each st around (12 sc)
3-5) sc in each st around (12 sc)
FINISH OFF

Put a little bit of stuffing in the stem and sew it to the bottom of the tree.

Use colored thread to embroider the decorations on the tree.


Liever Nederlands? Het originele, Nederlandse patroon staat op mijn eigen blog.

Christmas decorations DIY: christmas ball


Supplies:
2,5 mm hook
matching cotton yarn

Terms used:
ch = chain
sc = single crochet
dec = decrease, single crochet two stitches together
3dec = decrease three stitches, single crochet three stitches together
st = stitch

This pattern is worked in spirals. The rows are not closed. The new row starts in the first stitch of the previous row.

Pattern:
ch2 (or use a magic loop)
1) 6sc in 2nd st from hook (or 6sc in magic loop)
2) 2sc in each st around (12 sc)
3) (2sc in first st, sc in next st), repeat around (18 sc)
4) (2sc in first st, sc in next 2 st), repeat around (24 sc)
5) (2sc in first st, sc in next 3 st), repeat around (30 sc)
6) (2sc in first st, sc in next 4 st), repeat around (36 sc)
7-12) sc in each st around (36 sc)
13) (dec, sc in next 4 st), repeat around (30 sc)
14) (dec, sc in next 3 st), repeat around (24 sc)
15) (dec, sc in next 2 st), repeat around (18 sc)
16) (dec, sc in next st), repeat around (12 sc)
STUFF
17) (dec), repeat around (6 sc)
18) 3dec, 3dec, ch15
Cut off yarn, leaving a little tail. Use the tail to sew the top of the chain to the top of the ball, making a loop to hang the ball from.
FINISH OFF

Liever Nederlands? Het originele, Nederlandse patroon staat op mijn eigen blog.

DiY -painted stones-

An easy DIY for yourself, the kids, a birthday party or as a rainy day activity with the family :) You can buy stones in a store or at a garden centre, but usually they are more expensive then when you find them in nature. Go out for a walk and bring home a bunch of stones.. All you need is acrylic paint, paintbrush, water and your own imagination! I've painted mine turquoise and purple. Since they are still in their drying state, i have some time to figure out what i want to paint on them. Since i will be selling some on a market in a while, i really want to paint something easy and catchy!


i totally love these!
found here

based on crochet inspiration
found here

found here

found here

There are even workshops for a few hours
that you can follow. But i like to experience
at home :) Since we had a few rainy days,
it felt like a perfect thing to do!

Have fun painting them & if you
did let me know :)

Love,
Vera

Rainbows

I am knitting a rainbow laptop sleeve at the moment, using recycled and new cotton yarn. Rainbows are ideal for using up your stash.
I found some inspiration online, some of which I share here. If you want to make one of these, beneath each picture, there is a link to the pattern on Ravelry.


Rainbow scarf


Rainbow scarf


Rainbow dress


Rainbow mobile

Doilies!


I always used to think doilies were so old fashioned and not for young women like myself to be making, but recently I realized just how awesome and fun these pretty things are to crochet! You work in the round, so you can pretty much make it up as you go along, using simple repeating patterns or intricate designs, as long as you increase enough to keep it growing! To get you started, here's a simple pattern that I came up with for practice!

Simple Doily Pattern
Skills needed: magic ring, chain, slip stitch, double crochet, half double crochet, increase
This can be made with any yarn and hook. Acrylic doilies will be about 7 inches in diameter, while cotton crochet thread doilies will be about 4 inches in diameter, when made with the recommended hook size.

1. Start with a magic ring (or you could just chain 4 and slip stitch into the first chain to form a ring).

2. Double crochet 10 into the ring.

3. Chain 2. Double crochet twice into each stitch of the previous round until you get to the last stitch. Double crochet once in this stitch and slip stitch into the chain space to complete the round.
4. Chain 3. Skip the first stitch and double crochet once in the next one. Chain one. Skip the next stitch and double crochet once in the next one. Repeat until you come to the second to last stitch. Chain one and slip stitch into the chain space (where you started) to complete the round.

5. Chain 4. Skip the space made by the chain in the previous round and double crochet once into the next stitch, then chain two. Repeat this until you come to the last stitch of the round. (You should never make a stitch into an open space, only into stitches of the previous round.) Chain 2 and slip stitch into the chain space you began with to complete the round.

6. Chain 6. Repeat the last round, but chain 4 between each stitch this time.

7. After you slip stitch to complete the round, chain one. In the space made by the four chains of the previous round, half-double crochet once, double crochet twice, and half-double once more. Then slip stitch into the stitch of the previous round. Repeat that pattern for the entire round. After the last repeat, slip stitch into the chain you began with.

8. Chain 6, then slip stitch into the slip stitch you made between repeats in the previous round. Repeat this all the way around. When you reach the end, just bind off, weave in your ends, and you're done!

I hope that was easy enough to understand! Have fun making your doilies, and post them in the Birds Flickr group so we can all enjoy them! :D

Amigurumi Body Base

Hello everyone! Today I'm going to share a simple crochet pattern that I wrote for a basic amigurumi body.


[Please note: I wrote this pattern from memory, so it's largely untested. If you come across any mistakes, please let me know and I will fix them!]

Amigurumi Body Base
Skills needed: magic ring, crochet in the round, single crochet, increase and decrease
Yarn: Red Heart acrylic
Hook size: F/3.75 mm

Begin with the body color. I used black for this example, but use either a flesh tone (if adding fabric clothes) or the color you want the person's pants to be.)
1. Start with six single crochet stitches in a magic ring.
2. Single crochet twice in each stitch around, increasing to 12.
3. *Single crochet once, then single crochet twice in the next stitch.* Repeat ** six times, increasing to 18.
4. Single crochet once in the back loop of each stitch around.
5. Single crochet once in each stitch around.
6. *Single crochet twice, then single crochet twice in the next stitch.* Repeat ** six times, increasing to 24.
7-13. Single crochet in each stitch around.
(If you began with the color of the pants, change to the color of the shirt after row 9.)
14. *Single crochet twice, then crochet two together.* Repeat ** six times, decreasing to 18.
15. *Single crochet once, then crochet two together.* Repeat ** six times, decreasing to 12.
(Stuff the body before changing to a flesh tone for the head.)
16. *Single crochet once, then single crochet twice in the next stitch.* Repeat ** six times, increasing to 18.
17. *Single crochet twice, then single crochet twice in the next stitch.* Repeat ** six times, increasing to 24.
18. Single crochet in each stitch around.
19. *Single crochet twice, then crochet two together.* Repeat ** six times, decreasing to 18.
(If using snap on eyes, insert them at this time between the two rows of 24.)
20. *Single crochet once, then crochet two together.* Repeat ** six times, decreasing to 12.
(Stuff the head carefully.)
21. *Crochet two together.* Repeat ** six times, decreasing to six, and bind off.
You can sew the remaining hole together or do as I did and slip stitch in each stitch around before binding off, then tuck the tail inside. The tiny hole should be unnoticeable and will probably be covered with hair, anyway.

So there you go! Quick and easy. It'll end up being about 4 inches tall, if your stitches are as tight as mine end up being.

Oh, and here's an easy tutorial for adding hair to amigurumi heads, in case you wondered how!

See you next week(:

DIY Sunday - fake flowers

Hi there!
Today is the sunniest day since last summer aaaaand I was sitting on my new decorated balcony to create some magic! So here's your new DIY:


A cute fake flower for your garden or to decorate your room.


Here's what you will need:
- yarn (I chose purple and dark green)
- crochet hook
- wire
- tool
- scissors
- buttons


First, crochet a flower. I made a tutorial on crocheted flowers. It's easy to follow... you might as well check youtube for some great video tutorials!


After finishing the flower, put it aside and then take your wire, a button and the tool.


Fold the wire in the middle and


put it through the button.


Next, put the wire with the button through the middle of your flower.


That's what it will look like at the back of the flower.


Then, twirl the wire to make sure it stays in its place. I used my tool to help me! :)


Now, take the green yarn and wrap it around the wire. This is your flower stalk.


And guess what?! You are done!


A quick and easy and fun project to light up your Sunday!

Happy Crafting!

xo.
Katja

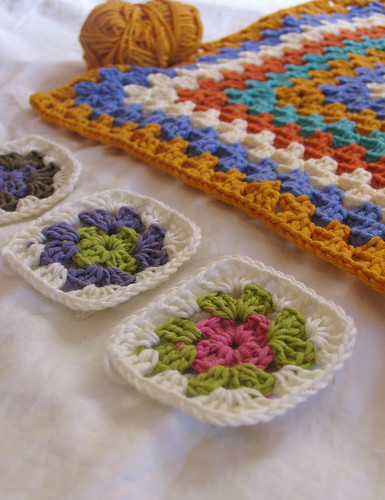
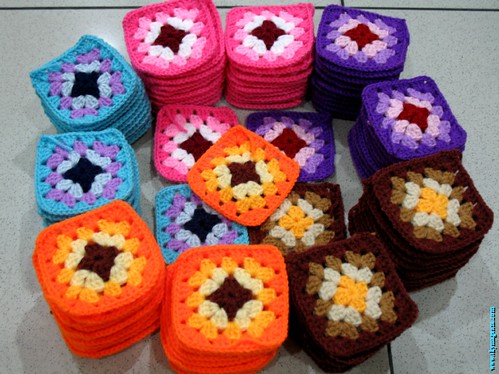
Granny Squares!

Want to add some color to your home? Try granny squares!!
 
Ideas for use around your home:
Add some colorful coasters
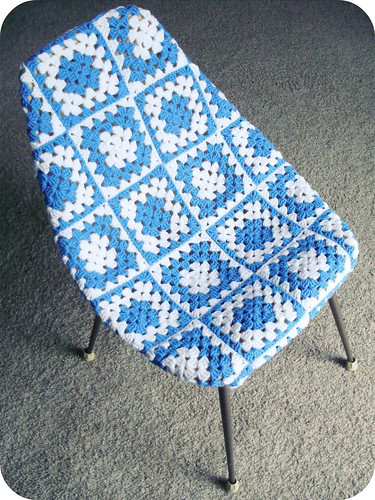
Cover an old chair!

Make a throw blanket

A basket for anything :)

A rug to brighten up the floor

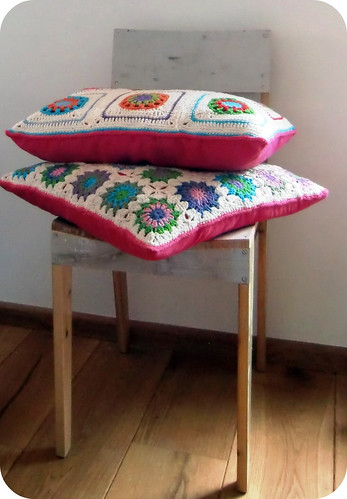
Throw pillows or chair cushions

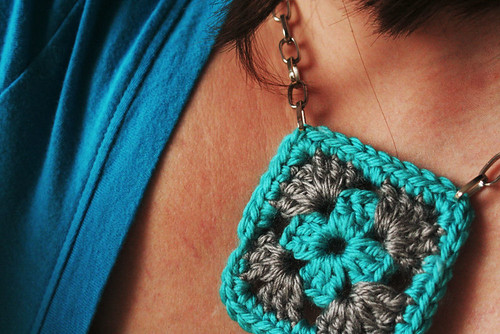
SHOES!

Or how about a necklace?
 (click on the images for sources)

So many fun ways to use them!! Amazing, no? Choose your favorite colors and get started :) Maybe white and an accent color for your home, maybe neutrals, maybe rainbows! What would you prefer? Show us in our Flickr group!


It's my goal to learn to make granny squares sometime during the summer. I'm still crazy busy, but I'll fit it in somewhere! :) Wanna learn with me? Check out these awesome tutorials on how to make them:
Katja's tutorial
How-to, even if you've never knit before! on Meet Me at Mikes
The Purl Bee's awesome granny square tutorial
HEXAGON granny squares from Attic24

DIY Sunday: crocheted necklace

Hey everyone! :)
I hope you are having a wonderful Sunday? Mine is very lazy and laid back - and that's puuuuurfect!

Today is DIY-day, you know that, right?
And today is also all about-..... CROCHET!

(haha xD)

And here's the new DIY just for you:


Let's crochet a pretty cute necklace together!


You will need yarn in different colours and a crochet hook. That's all!


First, chain 6.


Then, insert the hook into the first stitch you made, yarn over and then pull through the two loops in your hook.


Now, 2 single crochet in each sitch around. This makes 12 stitches.


Weave in the end and leave a long tail for sewing.
That's the basic element.


Now, start making as many circles as you want to! I made 9 - but in fact, I only used 8 of them!


Once all your circles are done, you might want to try out a cute way to arrange them... I decided to turn them into a necklace, bib-style.


Sew them together.


It's almost finished. :)


And now, add 2 crocheted strings to the ends of the necklace.

And you're done!!!!! :D


It looks pretty cute, doesn't it?

Have fun crocheting!
XO,
Katja