Showing posts with label garland. Show all posts

DIY -Make your own Xmas soap garland-

It's DIY time!! I made this a few days ago over at my own blog and also will share it here. For today we are gonna make a Xmas soap garland. It's not a whole new concept, but i have made one with mixed materials. You can hang it in your bathroom or toilet, just for a little Xmas feelin' (and it smells great!) or make one as a Xmas gift :)

DIY -Xmas soap garland-
supplies:
- little white pompoms
-wooden beads
-little soap stars
- kitchen/garden yarn
-needle
-little piece of ribbon

1 I first started with knotting this cute heart

2. Then it is already time for the fun part!!
Thread all your things on the yarn the way
you like it. Your needle will get soap on it,
so it's necessary to clean it from time to time.
If it's difficult to pull the needle through use
your tshirt or a tea towel for it.

3. You can make it as long as you like!
When your done just make a knot at the end.

4. Finish it with a loop, this way you can
hang your soap garland easily.

5. Then it will look like this!
Cut the end and finish your garland
with a cute bow.

And you are done!

XO. Vera

garland inspiration ♥

For today i've made a post for you that's all about garlands. When i was making this post & looked at all the pretty pictures that i found (on weheartit) i feel inspired to make lots and lots of garlands xD I just adore garlands & i'm so happy that they are not only used for holidays and birthdays anymore! You can use them in your garden, to decorate a cabinet, hang them in your babyroom or in your craftspace.

If you have never made one, i would say give it a try! Start with the the paper ones that you can make and see how it goes. You can use lots of materials to make your own garland. If you do want to use them in the garden, be sure to use plastic or remove it when drops of rain begin to fall... I've made garlands by hand, but i must say that the quickest way to make them is by using a sewingmachine (especially when you are working with fabric or felt). The garlands that i've made so far: one with paper cupcake holders, one with paper hearts, 3 with felt hearts and several with paper punched figures (good way to use your punches again!). On my list is the pompom garland and ehh i wanne make a real long one xD

Enjoy the garland parade & i hope you feel inspired enough to make one!


round and round we go...

just adore these!

just use the (news)paper &
cut out the shape of a heart


aren't these cute for a babyroom?


If you've a garland, leave a link
below i would love to see it!

XO. Vera

DIY Sunday: Polaroid Garland

Hi everyone!

And congratulations to all MOMs in the world. Very special thoughts go out to my mom who obviously is the best mom in the world!

Today's DIY is really easy but oh-so-cute! I have a bunch of these polaroid garlands everywhere around the house. They make a good window decoration:


You will need:


Polaroids
Scalpel
Fabric scraps
Glue
Clothespins
Wool


First, cut a shape or a letter from the Polaroid. I decided to cut the word LOVE and a heart.


Remove the shape (or letter ^^).


Now, take your fabric scrap and


cut it so it fits behind the polaroid.


Glue the fabric behind your polaroid.


Keep doing this with all polaroids. :D


Take your clothespins and your wool....


...and pin the polaroids to the wool-strap! Guess what? You're done.

I also think this is a very cute last minute mother's day present:

Have a very magical Sunday, everyone!

Loves,
Katja

Junk Mail Garland--Perfect Decor for a Jammie Party!

While browsing The Crafty Crow for ideas, I found the best tutorial for Junk Mail Garland!

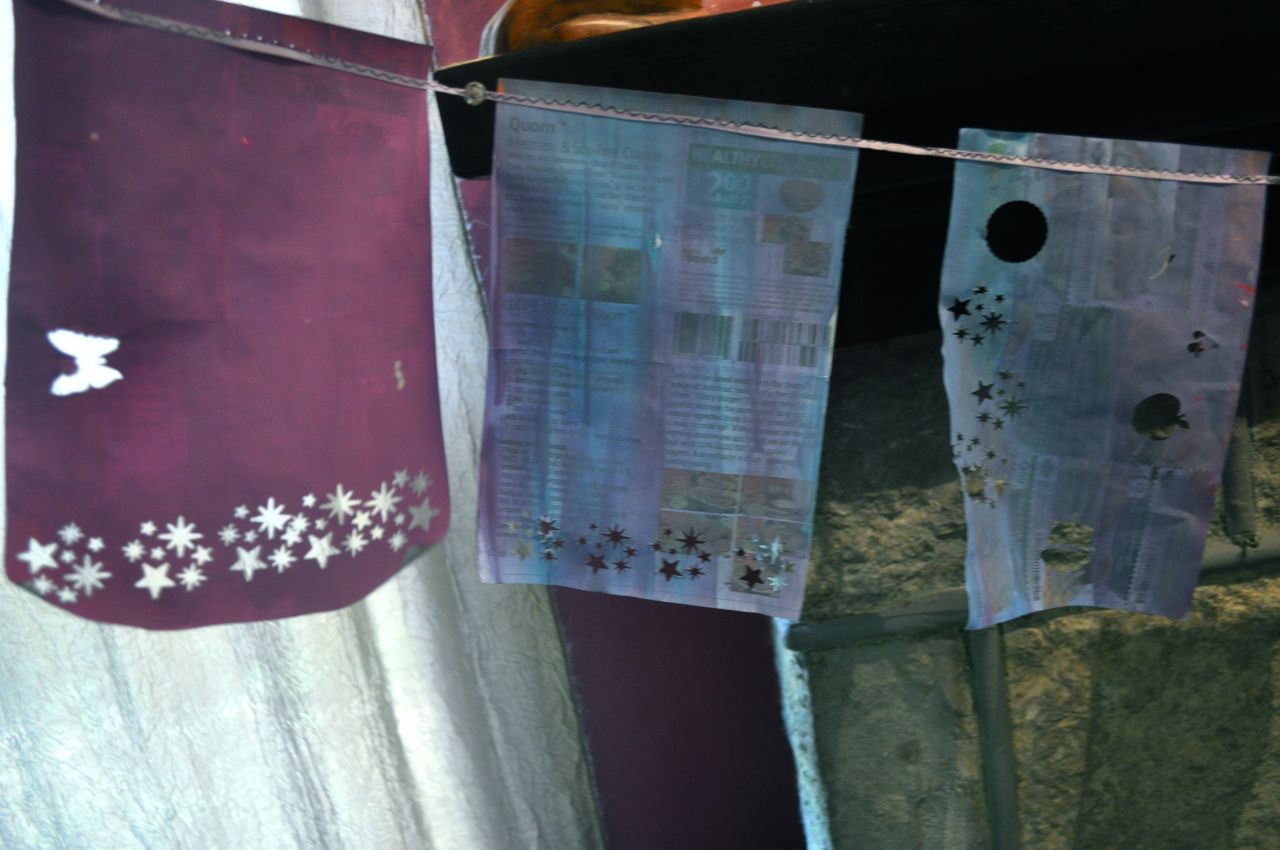
I usually have a giant pile of junk mail on my side table...I have to force myself to go through it to sort out the 'recycle', 'shred', and 'important stuff' into piles.

Recently my niece stopped by and wanted to paint.....hmmmm....I am an art teacher, but rarely do I have the supplies on hand for kids to get artsy crafty at my house, but luckily I had just read this amazing idea from Scrumdilly!

Quickly, I squirted some paint onto paper plates, snipped my junk mail into not-so-even sheets and let my niece and neighbor's daughter go to town painting the junk mail with pretty paint colors.

The paint dried quickly so I was able to bring out my paper punches and let them start punching fun shapes out of the garland.

While we did everything in less than an hour, we kept it fairly simple, but with a bit more preparation, you could use crazy scissors on the bottom edges or you could just cut it in waves like the tutorial shows....this garland would even be beautiful with some glitter! I didn't bother with that.

Later that night, once all the paint was dry, I used a long bit of ribbon to stitch the paper together to make garland.
Why would I need to create all this garland? Well I was planning a 'jammie party' with all the kids in my family for Saturday night and we needed decorations of course!

After creating one long piece to go across my fireplace, I took the pieces that were left over and punched holes along the top edge. When kids started arriving at the jammie party, I let them 'stitch' ribbon through the holes (over-under technique...even my 4-year old niece could do it!) and we hung the mini-garland pieces around the doorways at my house.

Supplies Needed:
Junk mail
paint
brushes
punches
ribbon
This was a really easy and fun craft project to do with kids...the garland was perfect for 'Our Rockin' Jammie Party'!!

It was super fun! We made chocolate covered strawberries, played games like Pictionary and charades, made popcorn and pizza and watched UP, tie-dyed shirts, this morning we ate waffles, played more games and went on a fun walk around the neighborhood.