Merry Xmas everyone!


As you might have noticed the feathergirls haven't been blogging frequentely lately. We all started with much enthusiasm and our blog was filled with daily inspiration. But as time passed by we noticed that it isn't always easy to combine it next to our daily life, filled with work, family, our own blogs etc. We're not planning to quit with our lovely feathergirls blog, but it's under reconstruction ;)

We also would like to hear your opinion about our blog so far, so feel free to leave a comment!

Wishing all of our readers a lovely, cozy and magical Christmas ♥

Love,
the feathergirls

DIY -headband with glittery stars-


DIY - headband with glittery stars-
You will need:
- a crochethook
- silver yarn and thicker purple yarn
-purple stars from foam
-needle
-embroidery thread

If you don't know how to crochet, just look
over at you tube and you will find lot's of
instruction videos how to do so.

Use two pieces of yarn and make 60 singles.
Now add the foam purple stars by using your
embroidery thread and secure them with
a single stitch. Make sure they are tight,
but not to tight!

ta da you're glittery stars headband is ready!

It was not easy to make a good picture,
but i think this one will do ;)

XO. Vera

ps If you like to see more inspiration + DIY's, take a look over at my own blog Seni with love

Christmas decorations DIY: owl


Supplies:
2,5 mm hook
matching cotton yarn

Terms used:
ch = chain
sc = single crochet
dc = double crochet
dec = decrease, single crochet two stitches together
st = stitch

This pattern is worked in spirals. The rows are not closed. The new row starts in the first stitch of the previous row.

Pattern:
body:
ch2 (or use a magic loop)
1) 6sc in 2nd st from hook (or 6sc in magic loop)
2) 2sc in each st around (12 sc)
3) (2sc in first st, sc in next st), repeat around (18 sc)
4) (2sc in first st, sc in next 2 st), repeat around (24 sc)
5) (2sc in first st, sc in next 3 st), repeat around (30 sc)
6) (2sc in first st, sc in next 4 st), repeat around (36 sc)
7-22) sc in each st around (36 sc)
23) (dec, sc in next 4 st) in back loops, repeat around (30 sc)
24) (dec, sc in next 3 st), repeat around (24 sc)
25) (dec, sc in next 2 st), repeat around (18 sc)
26) (dec, sc in next st), repeat around (12 sc)
STUFF
27) (dec), repeat around (6 sc)
FINISH OFF

eyes (make 2):
ch2 (or use a magic loop)
1) 6sc in 2nd st from hook (or 6sc in magic loop)
2) 2sc in each st around (12 sc)
3) (2sc in first st, sc in next st), repeat around (18 sc)
FINISH OFF

ears (make 2):
ch2
2sc in 2nd st from hook
FINISH OFF

wings (make 2):
ch7
1) sc in 2nd st from hook, sc in next 4 st, 8dc in last st of chain
Keep on working in the established direction, the next stitches are worked in beginning chain
sc in next 4 st, 3sc in last st before the first st of this round
2) sc in next 5 st, 2sc in next 8 st, sc in next 4 st, (2sc) in next 3 st
3) sc in next 5 st, (2sc, sc in next st) 8 times, sc in next 4 st, (2sc, sc in next st) 3 times
4) sc in next 5 st
FINISH OFF

Make the pupils, beak and feet out of felt

Sew the wings, ears and eyes to the body.
Use glue to paste the pupils, beak and feet to the body.


Liever Nederlands? Het originele, Nederlandse patroon staat op mijn eigen blog.

Christmas decorations DIY: christmas tree


Supplies:
2,5 mm hook
matching cotton yarn

Terms used:
ch = chain
sc = single crochet
dec = decrease, single crochet two stitches together
st = stitch

This pattern is worked in spirals. The rows are not closed. The new row starts in the first stitch of the previous row.

Pattern:
Tree:
ch2 (or use a magic loop)
1) 6sc in 2nd st from hook (or 6sc in magic loop)
2-3) sc in each st around (6 sc)
4) 2sc in each st around (12 sc)
5-6) sc in each st around (12 sc)
7) (2sc in first st, sc in next st), repeat around (18 sc)
8-9) sc in each st around) (18 sc)
10) (2sc in first st, sc in next 2 st), repeat around (24 sc)
11-12) sc in each st around (24 sc)
13) (2sc in first st, sc in next 3 st), repeat around (30 sc)
14-15) sc in each st around (30 sc)
16) (2sc in first st, sc in next 4 st), repeat around (36 sc)
17-18) sc in each st around (36 sc)
19) (dec, sc in next 4 st) in back loops, repeat around (30 sc)
20) (dec, sc in next 3 st), repeat around (24 sc)
21) (dec, sc in next 2 st), repeat around (18 sc)
22) (dec, sc in next st), repeat around (12 sc)
STUFF
23) (dec), repeat around (6 sc)
FINISH OFF

Stem:
ch2 (or use a magic loop)
1) 6sc in 2nd st from hook (or 6sc in magic loop)
2) 2sc in each st around (12 sc)
3-5) sc in each st around (12 sc)
FINISH OFF

Put a little bit of stuffing in the stem and sew it to the bottom of the tree.

Use colored thread to embroider the decorations on the tree.


Liever Nederlands? Het originele, Nederlandse patroon staat op mijn eigen blog.

Christmas decorations DIY: christmas ball


Supplies:
2,5 mm hook
matching cotton yarn

Terms used:
ch = chain
sc = single crochet
dec = decrease, single crochet two stitches together
3dec = decrease three stitches, single crochet three stitches together
st = stitch

This pattern is worked in spirals. The rows are not closed. The new row starts in the first stitch of the previous row.

Pattern:
ch2 (or use a magic loop)
1) 6sc in 2nd st from hook (or 6sc in magic loop)
2) 2sc in each st around (12 sc)
3) (2sc in first st, sc in next st), repeat around (18 sc)
4) (2sc in first st, sc in next 2 st), repeat around (24 sc)
5) (2sc in first st, sc in next 3 st), repeat around (30 sc)
6) (2sc in first st, sc in next 4 st), repeat around (36 sc)
7-12) sc in each st around (36 sc)
13) (dec, sc in next 4 st), repeat around (30 sc)
14) (dec, sc in next 3 st), repeat around (24 sc)
15) (dec, sc in next 2 st), repeat around (18 sc)
16) (dec, sc in next st), repeat around (12 sc)
STUFF
17) (dec), repeat around (6 sc)
18) 3dec, 3dec, ch15
Cut off yarn, leaving a little tail. Use the tail to sew the top of the chain to the top of the ball, making a loop to hang the ball from.
FINISH OFF

Liever Nederlands? Het originele, Nederlandse patroon staat op mijn eigen blog.

DIY -Make your own Xmas soap garland-

It's DIY time!! I made this a few days ago over at my own blog and also will share it here. For today we are gonna make a Xmas soap garland. It's not a whole new concept, but i have made one with mixed materials. You can hang it in your bathroom or toilet, just for a little Xmas feelin' (and it smells great!) or make one as a Xmas gift :)

DIY -Xmas soap garland-
supplies:
- little white pompoms
-wooden beads
-little soap stars
- kitchen/garden yarn
-needle
-little piece of ribbon

1 I first started with knotting this cute heart

2. Then it is already time for the fun part!!
Thread all your things on the yarn the way
you like it. Your needle will get soap on it,
so it's necessary to clean it from time to time.
If it's difficult to pull the needle through use
your tshirt or a tea towel for it.

3. You can make it as long as you like!
When your done just make a knot at the end.

4. Finish it with a loop, this way you can
hang your soap garland easily.

5. Then it will look like this!
Cut the end and finish your garland
with a cute bow.

And you are done!

XO. Vera

Cute blog(s)


I'm not a big fan of reading magazines or newspapers on the internet, but for this e-magazine i will make an exception! I love reading the blog of Danielle. Above i have used pictures of the sweetness that i found over at her blog, to give you an impression :) If you don't know a blog, check it out here And if you like to check out the link to the e-magazine, go over to this topic of her blog!

It's always fun to discover new blogs full of inspiration, so i thought it would be a great idea to share! Leave a comment with one or two of your most favorite blogs, this way you can exchange with all the other followers and you may discover new blogs ♥

XO. Vera

DIY -make your own little goodie/giftbag-

Well hello, i hope you are still enjoying our (crafty) blog :) For today i have another DIY for you. I made this post several months ago over at my own blog, but with the upcoming Holidays i thought it would be lovely to also share it here ❤

When i was sorting out my craftsupplies i saw all my pretty wrappingpapers and thought it was a pity that they were just lying around, instead of being used! There's such pretty (gift)paper all around! Just a few examples: Christmas wrapping paper, scrapbookpaper or even design your own!


Supplies
- (gift)paper
-scissors
-double sided tape

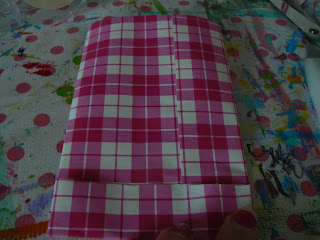
cut a piece of paper in the size that you like

fold your paper

fold the other (smaller half) over the big one

confirm you double sided tape
and fold the smaller side over it

fold the 'bottem' up

add double sided tape
fold & make sure it's solid

almost done..

i've cut a little 'wave' on top with the siccors
& added my own 'business' card

You can use little clothespins to close it,
use a stapler and add your 'business' card there.
You can also make two holes on top and pull
a little ribbon through etc.

There are endless ways..
explore yours xD

XO. Vera

Recently Stumbled...

Do you stumble?

Sometimes I like to stumble while 'watching' football or when I have a little bit of time to kill. It can be a real time waster, because it sucks me into all of my favorite types of sites...Photography, crafting, recipes....but I can also save my favorite stuff to return to later when I have more time or I just need some inspiration. Also it keeps me in check on what I really want to look at without cluttering up my bookmarks, (I need to organize the bookmark tab on my computer, so much randomness!)

Anyway.

Here are some of my most recent finds. I think you will like them!

Pinhole Photography: 10 Paper Cameras for Photograph Purists 

Here are some amazing pinhole cameras. Check out the site for more!


30 Day Speed Creating

This guy is amazing. I love all of his creations, especially these:


Thread wrapped grapes...and some were dipped in wax. Amazing.


A colored pencil bookshelf, I love it!


Lamps made with resin, a tube sock and a balloon. Gorgeous and lovely!


I cannot stop thinking about this awesome Funion creation. Delicious and elegant.

Made By Joel

 Everything made by Joel is lovely.  He makes the simplest toys for his kids and I just love them. He even has tons of free printables.


Thanks for reading! Hope you are having a good week. I did some paper mache for my classroom today, I hope to be finished in time for next week's post!

Flowerloom ❃

A while back i bought a flowerloom, because i wanted to make vintage flowers. The instructions that i found in the box, weren't great :( So i thought i would surch on the internet, but couldn't really find a great instruction their either (except pictures from pretty flowers that we're made with the flowerloom). Finally a few days ago i found this great video over at Martha Stuarts blog and i could start making flowers. If you like to watch that video click HERE. This is the flowerloom that i have:
found here

ta da... and these are my first three!!
Once you get started it's really addictive ;)

The flowerloom is cheap and so so cute!
Just a perfect gift for yourself or for the
upcoming holidays ;)

Have fun!!

XO. Vera

A cupcake parade!

A cupcake parade!!

Last winter I taught a class about color mixing using frosting...I made up red, yellow and blue frosting for each student and let them mix the colors on a plate and then spread the frosting on to wafer cookies. It was super fun!!

When I got home I had a bunch of left over frosting so I decided to make some cupcakes. And then I had a fun photo shoot!!

Wouldn't these be great for a party?


Here are a few that I added text using Picnik. Feel free to print them on cardstock for a quick and easy card!


Hope you have a great week!
Nellie